



DeLorean Power Steering – Best Upgrade Yet!
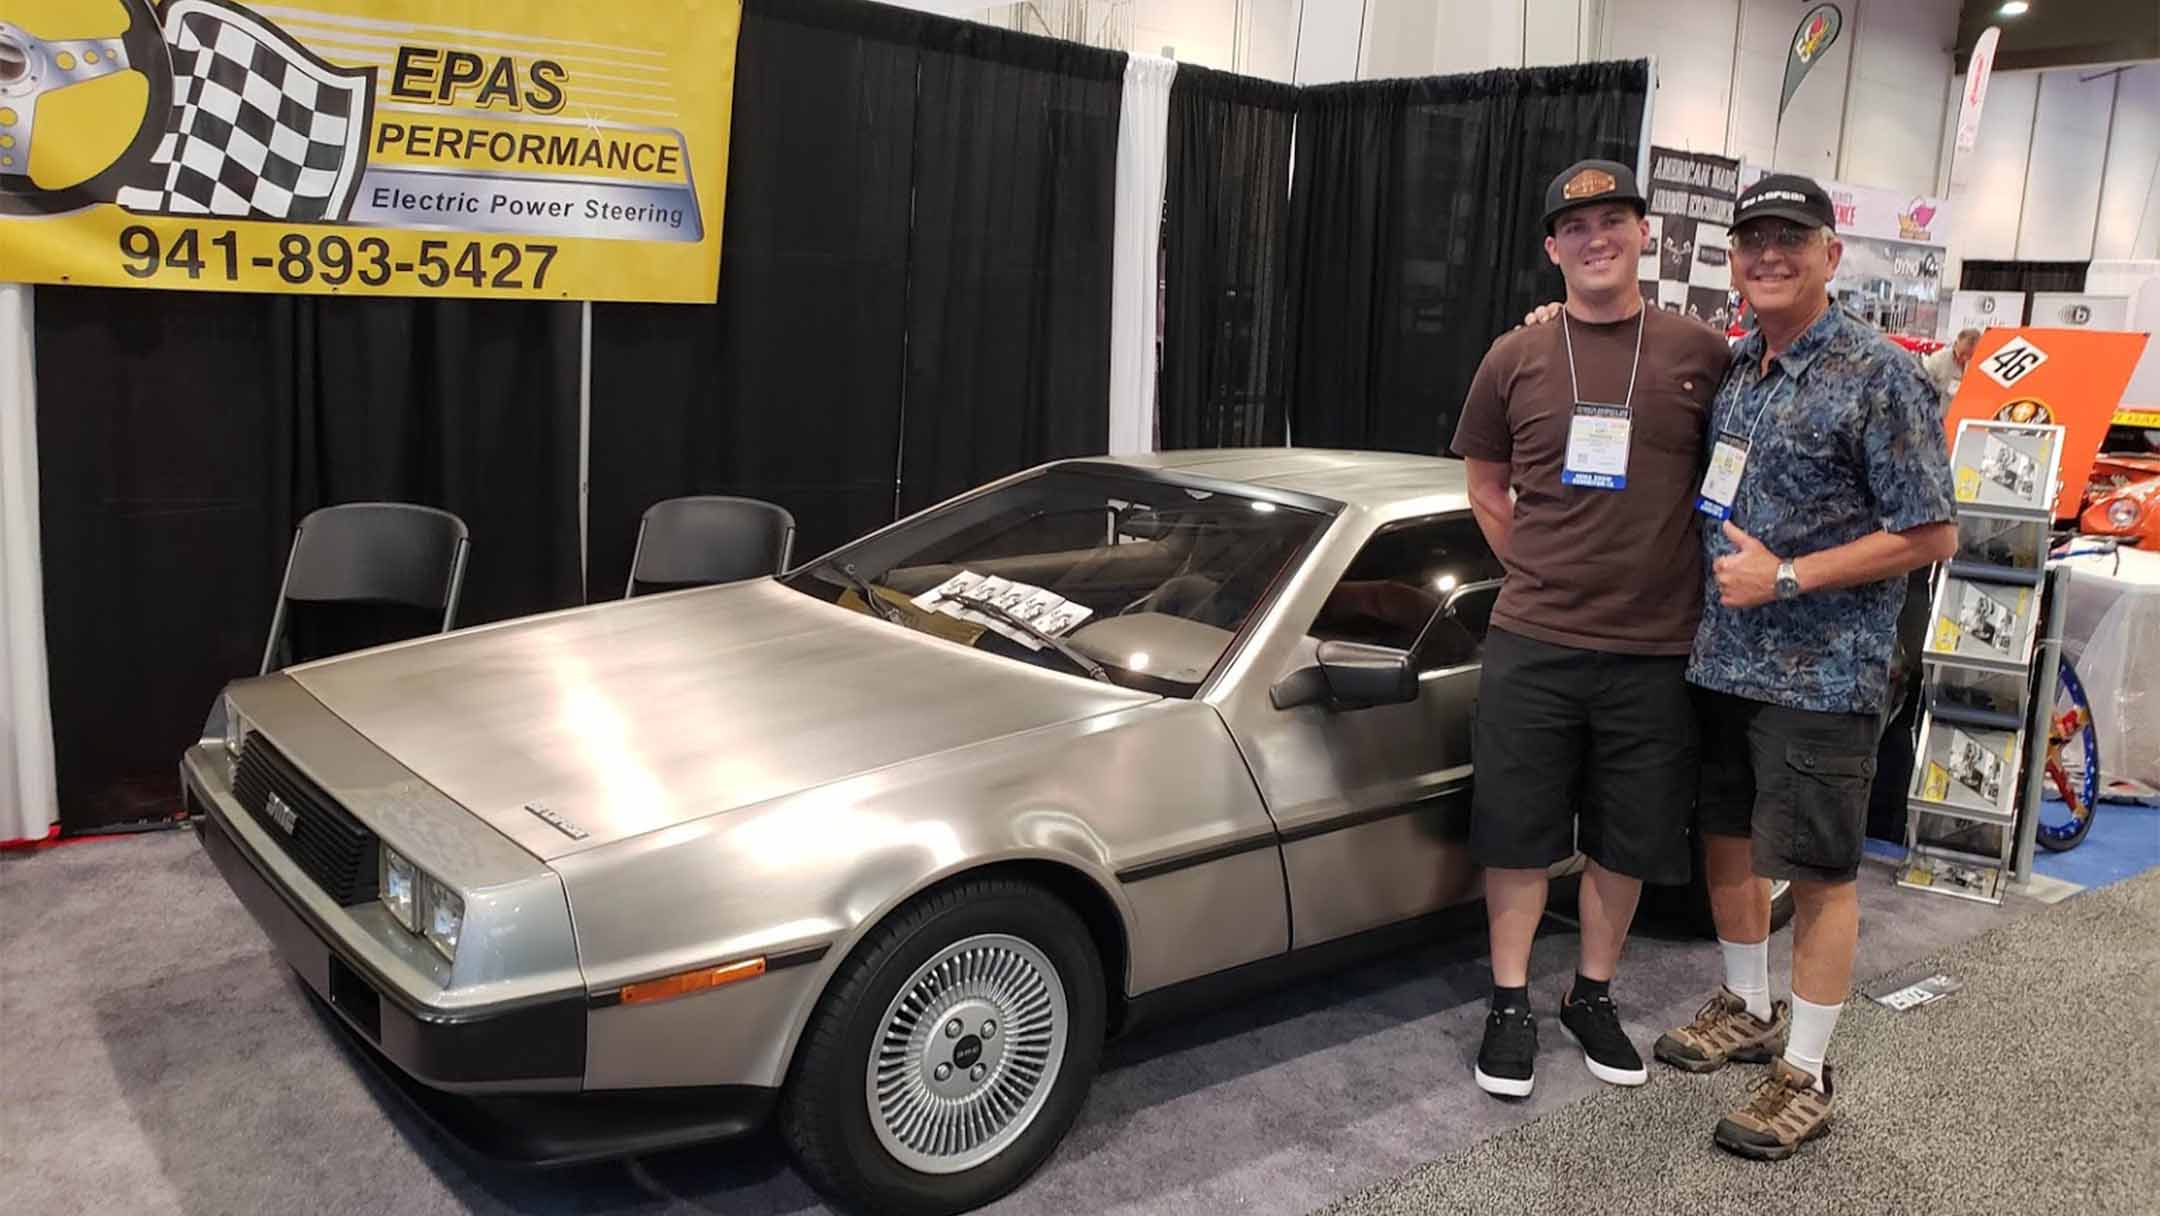
by Gordon Carpenter I just received the best DeLorean upgrade I could imagine for my car, VIN 10987: The new Electric Power Steering system! Those who know me would probably agree, I am an early adopter of new technology and upgrades when discretionary funds are available. My car, VIN 10987, was given a Stage I Exhaust and Stage II Engine upgrade in 2003. My full refurbishment of the DeLorean interior in 2011, included Dynamat for noise reduction, a remodel of the center console to accommodate a double DIN stereo head with GPS and installation of an electrically controlled HVAC by Vintage Air. Upon learning of the power steering upgrade for DeLoreans, I was immediately curious. My wife and I have owned our DeLorean since 1985, and she has avoided driving the car because of the difficulty of turning the car at low speed. This October that all changed! Driving our DeLorean became ‘A-Piece-of-Cake’ with the installation of the recently announced Electric Power Steering upgrade. Developed by EPAS Performance in Florida, making U-turns, 3-point turns and navigating tight parking lots can be easily accomplished with the push of a single finger on the steering wheel. My system was installed in about four hours. My wife and I are very happy with the results! When compared to other upgrades available, the Power Steering System is by far the best upgrade for the money! VIN 10987 was invited to demo the installation of the Electric Power Steering system at the 2018 SEMA, Las Vegas show over the last week of October. Having just completed the 665 mile round trip drive from San Diego to Las Vegas for the DeLorean Weekend, driving there a second time in one month made for an easy comparison. Whether driving at highway speeds or navigating city streets, it is a true pleasure to drive our DeLorean now! Wiggling the DeLorean through the maze of narrow aisles in the SEMA building… my 3 handlers were nervous the whole trip, but it was a piece-of-cake for me at the steering wheel! By far, the power steering system is the best upgrade any DeLorean owner can install in the car! Anyone who drives their DeLorean must deal with making U-turns, 3-point turns or navigating tight parking lots will truly enjoy their car after getting this upgrade! Best of all, the system is adjustable, allowing the driver to adjust the level of steering assist they are comfortable with. Don’t get me wrong, the Stage I & II upgrades to the DeLorean power plant are impressive (can you ever have too much power?) – but this power steering upgrade reignites the “new car feel” of your DeLorean! FAQs Q. How long does it take to install?A. It can be installed in about 4 hours. Q. Can I install it myself?A. Yes, if you’re an accomplished mechanic.. Q. What additional machining or shop work is required to install?A. None, The power steering assembly comes ready to install. You will probably need to realign the steering wheel after installation if top-center of the wheel is slightly off. Q. How much will the whole thing cost me?A. As of November 2018, the EPAS Performance assembly listed for $1,987.52. Installation time may vary some. Labor is about $1,400, bringing a fully installed power steering system to approximately $3400. Q. Will I have leaking fluid problems down the road?A. No. There are no fluids in this system – it’s 100% electrical. Q. Does the Power Steering System make noise?A. No, there is nothing to hear, even when the engine is off and one turns the steering wheel, Nothing! Q. Does the power steering try to return to center after a turn?A. No, the power steering system only responds to changes the driver makes to the steering wheel orientation. Stays right where the driver leaves it. Q. You mentioned the power steering is adjustable… How?A. The system has a potentiometer that allows the driver to increase the power steering assist when needed. I prefer full assist in tight situations like parking lots and 3-point turns. I find the DeLorean only needs 50% assist when driving at highway speeds. Q. Where is the potentiometer located?A. It is located under the knee board to the right of the steering column. If you are left handed, it might make sense to locate it left of the steering column. Q. What happens if the power steering system fails?A. You loose the power assist and your steering wheel goes back to the stock level of effort. Keep in mind that this system has been approved by SEMA.
DeLorean Time Machine – The “A” Car
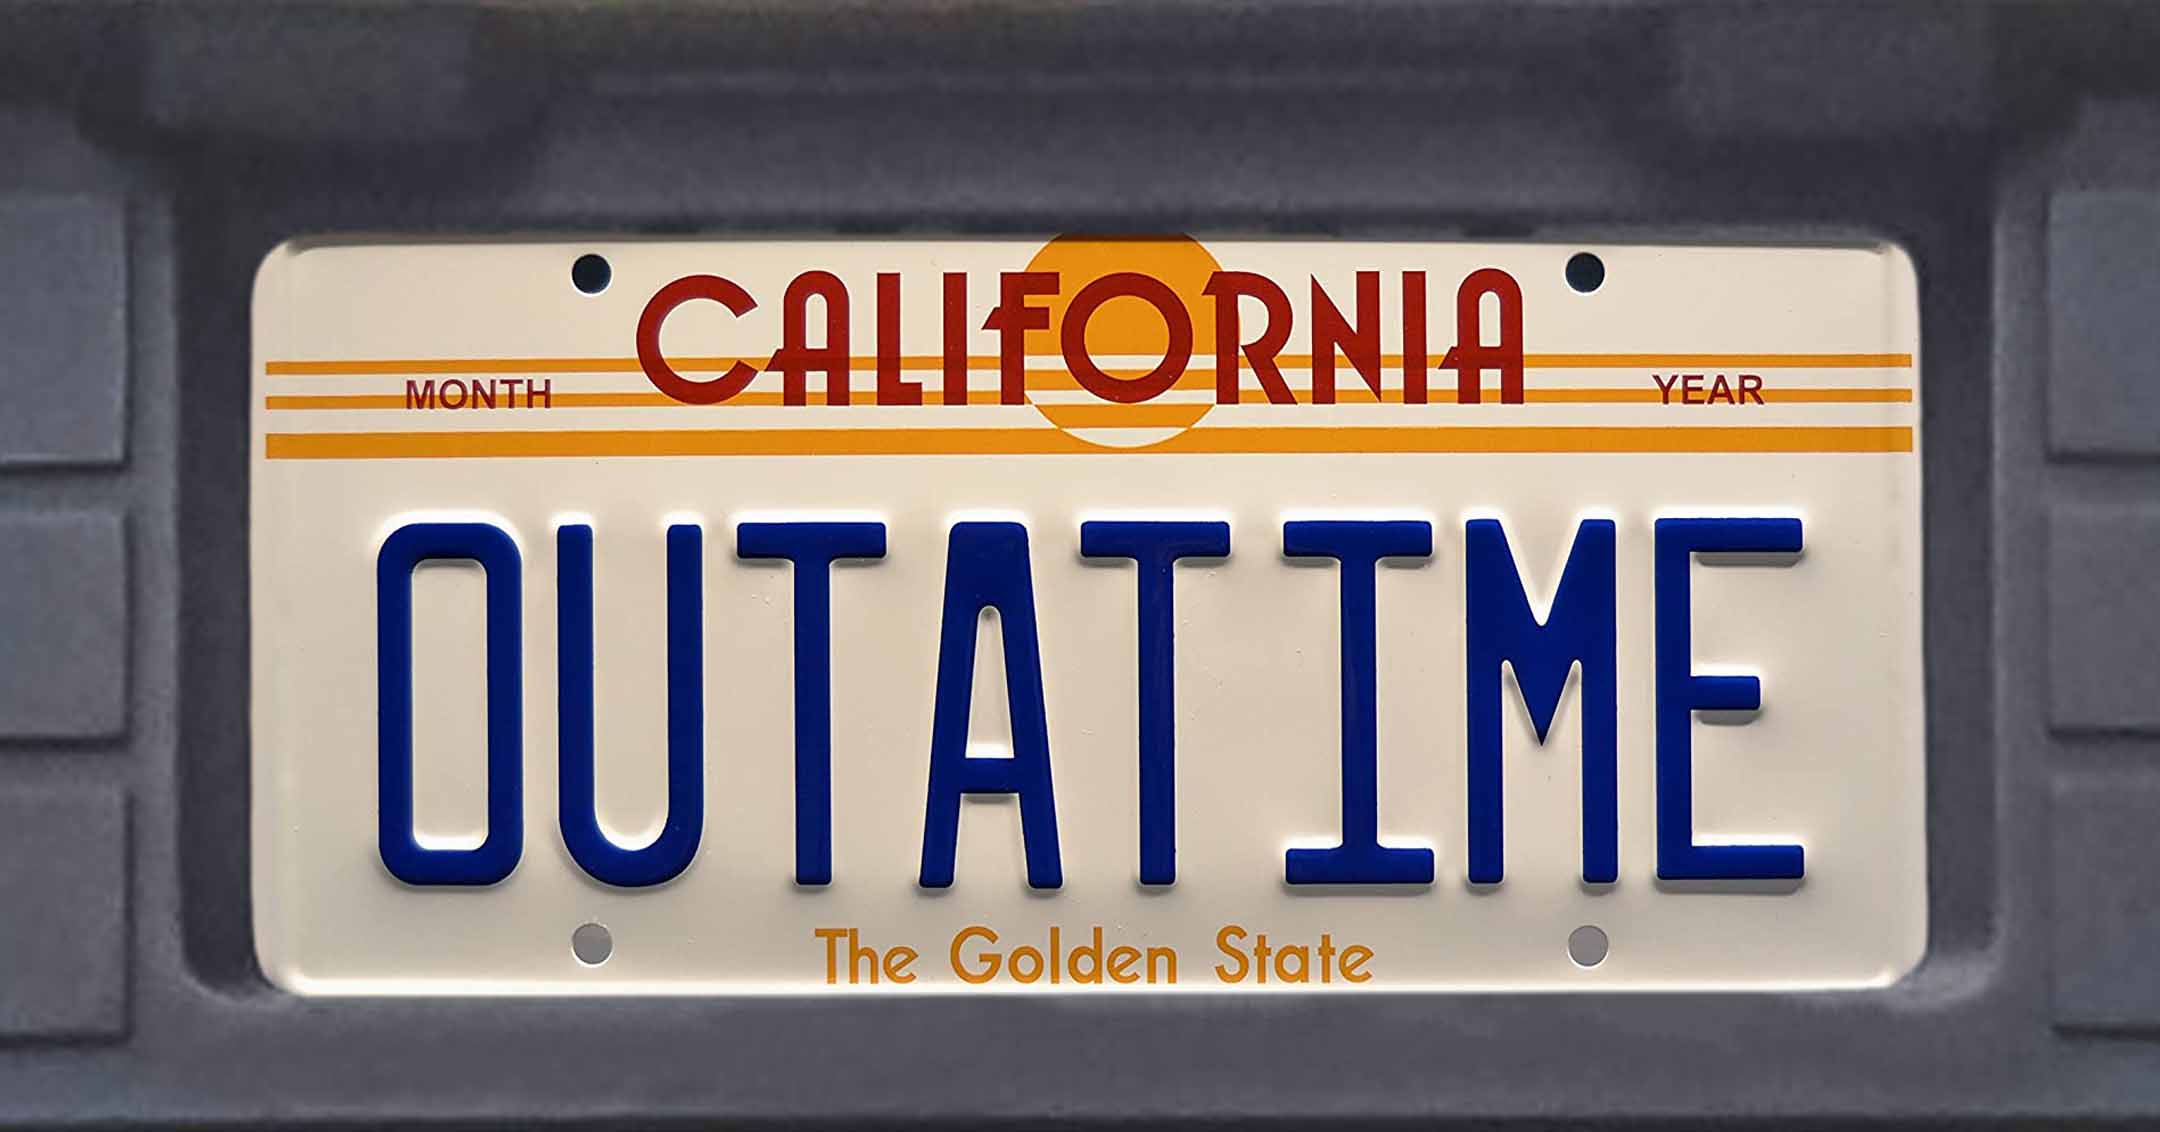
by Steve Concotelli This vehicle is the original DeLorean Time Machine immortalized on screen in the Back to the Future trilogy. It’s widely considered to be the most famous movie car in the world. This particular car began its life as a stock DeLorean manufactured in October of 1981. Two years later, in 1983, Universal Studios purchased the car from a private owner, to be converted into Doc Brown’s Time Machine. The design of the Time Machine was based on drawings by artists Ron Cobb and Andrew Probert. Over the course of 10 weeks, the The Time Machine components were built and assembled by Kevin Pike and his team at Filmtrix. Michael Scheffe served as the Construction Coordinator on the project. He was responsible for acquiring pieces for the vehicle and supervising the construction. Scheffe also designed several components on the Time Machine, including Mr. Fusion. Once completed, the vehicle received the designation of the “A” Car or “Hero” car – due to the fact that this vehicle was the first Time Machine built for Universal. It was also the most detailed, both inside and out. Two other Time Machines were also built for Back to the Future, including a stunt car (designated the “B” Car) and a process car (the “C” Car) that was cut in half, in order to film inside the vehicle. While all of the Time Machines were meant to be identical – there were differences between the vehicles. Most notable were the Time Circuits. Originally, all three vehicles had Time Circuits with numeric-only displays. So, the date October 26, 1985 read 10-26-1985. However, Bob Zemeckis and Bob Gale felt that a row of numbers made it too difficult for the audience to read. Since production was already underway, the Special Effects team quickly changed the “B” and “C” Car Time Circuits to alphanumeric displays. So October 26,1985 reads OCT-26-1985. These are the Time Circuits fans are familiar with. However, since the “A” Car wouldn’t be used for interior close-ups, they didn’t swap out the Time Circuits in that vehicle. So, the Time Circuits in the “A” Car are technically wrong! You can see the “A” Car’s numeric Time Circuits in several shots when Einstein is sitting in the car during the Twin Pines Mall scene. The “A” Car received the most screen time in Back to the Future and was used for all the beauty shots in the film, including the iconic shot of the Time Machine rolling out of Doc Brown’s truck. The “A” Car was also used extensively in Back to the Future Part 2 and Part 3. It also appeared on camera for the Huey Lewis “Power of Love” video, as well as Back to the Future the Animated Series and Secrets of the Back to the Future Trilogy with Kirk Cameron. After the trilogy, the “A” Car served as a tourist attraction at Universal Studios Hollywood. Sometimes, it was displayed in front of Back to the Future: The Ride. Other times, Doc Brown character actors drove the vehicle through the park as they interacted with guests. Through the years, thousands of fans had their picture taken next to the car, in the car, or sometimes even sitting on the car. When Doc wasn’t using the car, it was often kept on the backlot – unlocked, with the keys in the ignition. There are reports that several fans discovered this fact and made their way onto the Universal backlot. There, they were able to locate the Time Machine, open it up and start it up. To make matters worse, some fans who desired a souvenir went so far as to steal pieces off the car. Over time, many of the most iconic pieces went missing, including Mr. Fusion, the Time Circuits and the Flux Capacitor. As a movie prop, the Time Machine was built to look good on camera – not to be long lasting. Many of the pieces used to build the Time Machine were fragile – being made of glass, neon, and wood. Unfortunately, the Time Machine was not able to withstand the daily barrage of park guests poking, pulling, touching, and prodding the vehicle. Many pieces on the car were broken or damaged as a result. Adding to the car’s problems was the weather. When the car wasn’t in use, it was parked outside – where sun and rain caused significant damage to the fragile Time Machine pieces, as well as the vehicle itself. Holes drilled throughout the car’s panels allowed water and moisture to get inside. The back window had also been removed to make room for the Time Machine components – which meant the car was no longer waterproof. When it rained, the water found its way into the bulkhead, wreaking havoc on the car’s electrical systems. Throughout the years, Universal’s transportation team worked to keep the vehicle running. While they did attempt to repair the Time Machine components, accuracy was not a major consideration. Pieces were altered or put back on the car incorrectly. A pair of stereo speakers were added to the pontoons, allowing the car to blast music wherever it went. The rear vents, originally painted with heat and oil splatter effects, were inaccurately painted black. While the “A” Car suffered, the other screen used Time Machines fared even worse. The “B” Car was destroyed by the train at the end of Back to the Future Part 3. The “C” Car was eventually disposed of. This meant that the “A” Car was the only original Time Machine left from the first film – adding to its significance. As the years passed, the condition of the car deteriorated to the point where the vehicle no longer functioned. At that point, Universal put the car on permanent display along the tram route, along with several other picture cars. A large tarp structure was built to help protect the vehicles from the elements. But by that point, it was too late. Birds, mice and cats had
Social Media for DeLorean Clubs

After having conversations with a few DeLorean club/organization group leaders, I was prompted to restructure how the Orange County DeLorean Club’s social media is setup. Mainly, to distinguish the difference between a “Public Page” vs. a “Closed Group” on Facebook. Facebook has three main user formats: There are also three main distinctions for groups. They can be public, closed, or secret. The OCDC has two Facebook formats, a public page and a closed group. The main reason for having a closely restricted, closed group, is to foster discussion and communication among those who are involved with the local group. On rare occasions, DeLorean owners outside of Orange County are added to the group, but again, this is rare. By keeping the closed group limited only to people who live in Orange County, AND who own a DeLorean, the expectation and hope is that the local community can build up a trust and relationship with each other. Lastly, the Orange County DeLorean Club has a mailing list that anyone is encouraged to join. Almost all of the emails will be related to local events and gatherings, so those outside of the area may get bored with the content… but they may also get ideas for their local DeLorean clubs/groups. I hope this article can help other DeLorean clubs and groups around the world figure out how to best serve their local community. Driving a DeLorean is fun – but it’s SO MUCH MORE FUN when you get together with other DeLoreans.
Sonax Wheel Cleaner Plus is Magic on DeLorean Rims
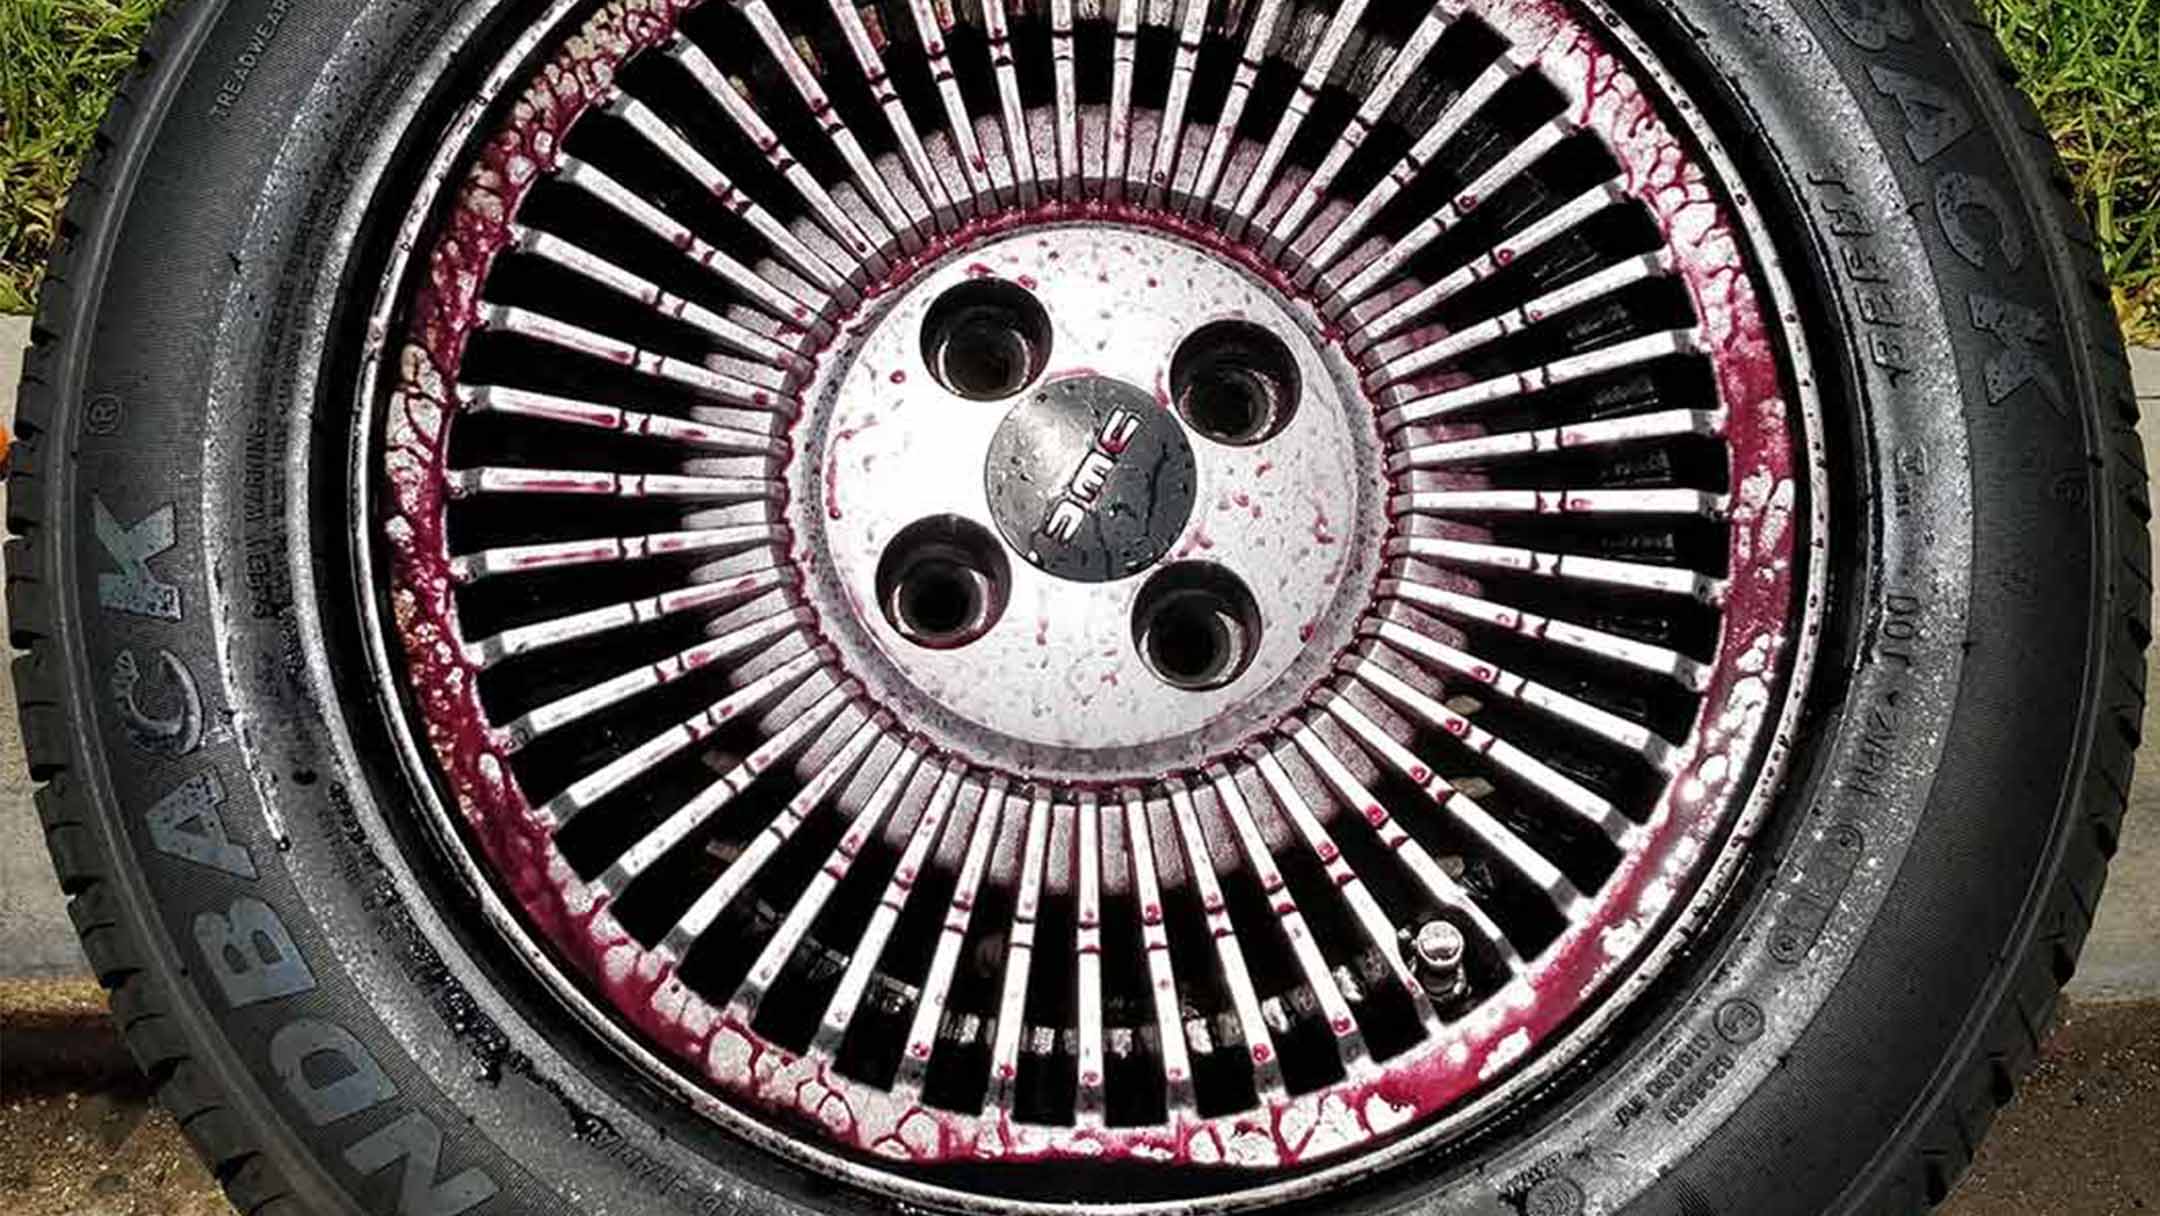
Sonax Wheel Cleaner Plus is magic! Well, it’s magic for any DeLorean owner who has ever spent hours with rags and tooth brushes trying to clean between every fin of the DeLorean rims. Why is it magic? With very little effort, 98% of the brake dust that gets caked onto the rims comes off, leaving them surprisingly clean. With a few sprays of the bottle, a few minutes of waiting, and a hose, your rims can look pretty amazing. And if you want to get that last 2%, break out the brush and the remaining brake dust comes off easily. We used a home pressure-washer when cleaning off the Sonax, but many people on YouTube who recommend Sonax use hoses. We took all four rims off the car to install DeLorean Go’s Brake Dust Shields, so figured we’d ‘super-clean’ the rims – outside and inside. The Sonax did an amazing job cleaning the inside, which had decades of baked-on, caked-on brake dust. (Who ever cleans the INSIDE of the rims… other than Col Bennett?) We did try a large scrub brush for a minute while cleaning the inside, but it didn’t seem to do any better than the pressure-washer. Check out the before-and-after photos below. The instructions specifically say to spray the rims when they are cool and DRY. Do NOT wet them first. Within a few moments of spraying a dry rim, you’ll see the liquid turn a deep purple and start dripping down the rim. As most of us know, in order to get into the nooks-and-crannies of the fins, you need to get some weird angles. Of course, taking the rim off the car made it much easier. And I would say, don’t be shy when spraying. Get a good coat of the liquid on the rim. The instructions then say to wait 2-4 minutes before hosing it off. Another interesting note – Sonax is acid-free! Which means it won’t damage your rims. As of this writing, Sonax Wheel Cleaner Plus is about $18 for a 16.9 oz. bottle. Based on our usage, I estimate that one bottle will clean (just the ‘outside’) all four rims, two times. Check out the photos and video if your skeptical – then gamble $20 on buying a bottle and give it a try – THEN, share your comments below.
The ‘Gold-plated’ DeLoreans
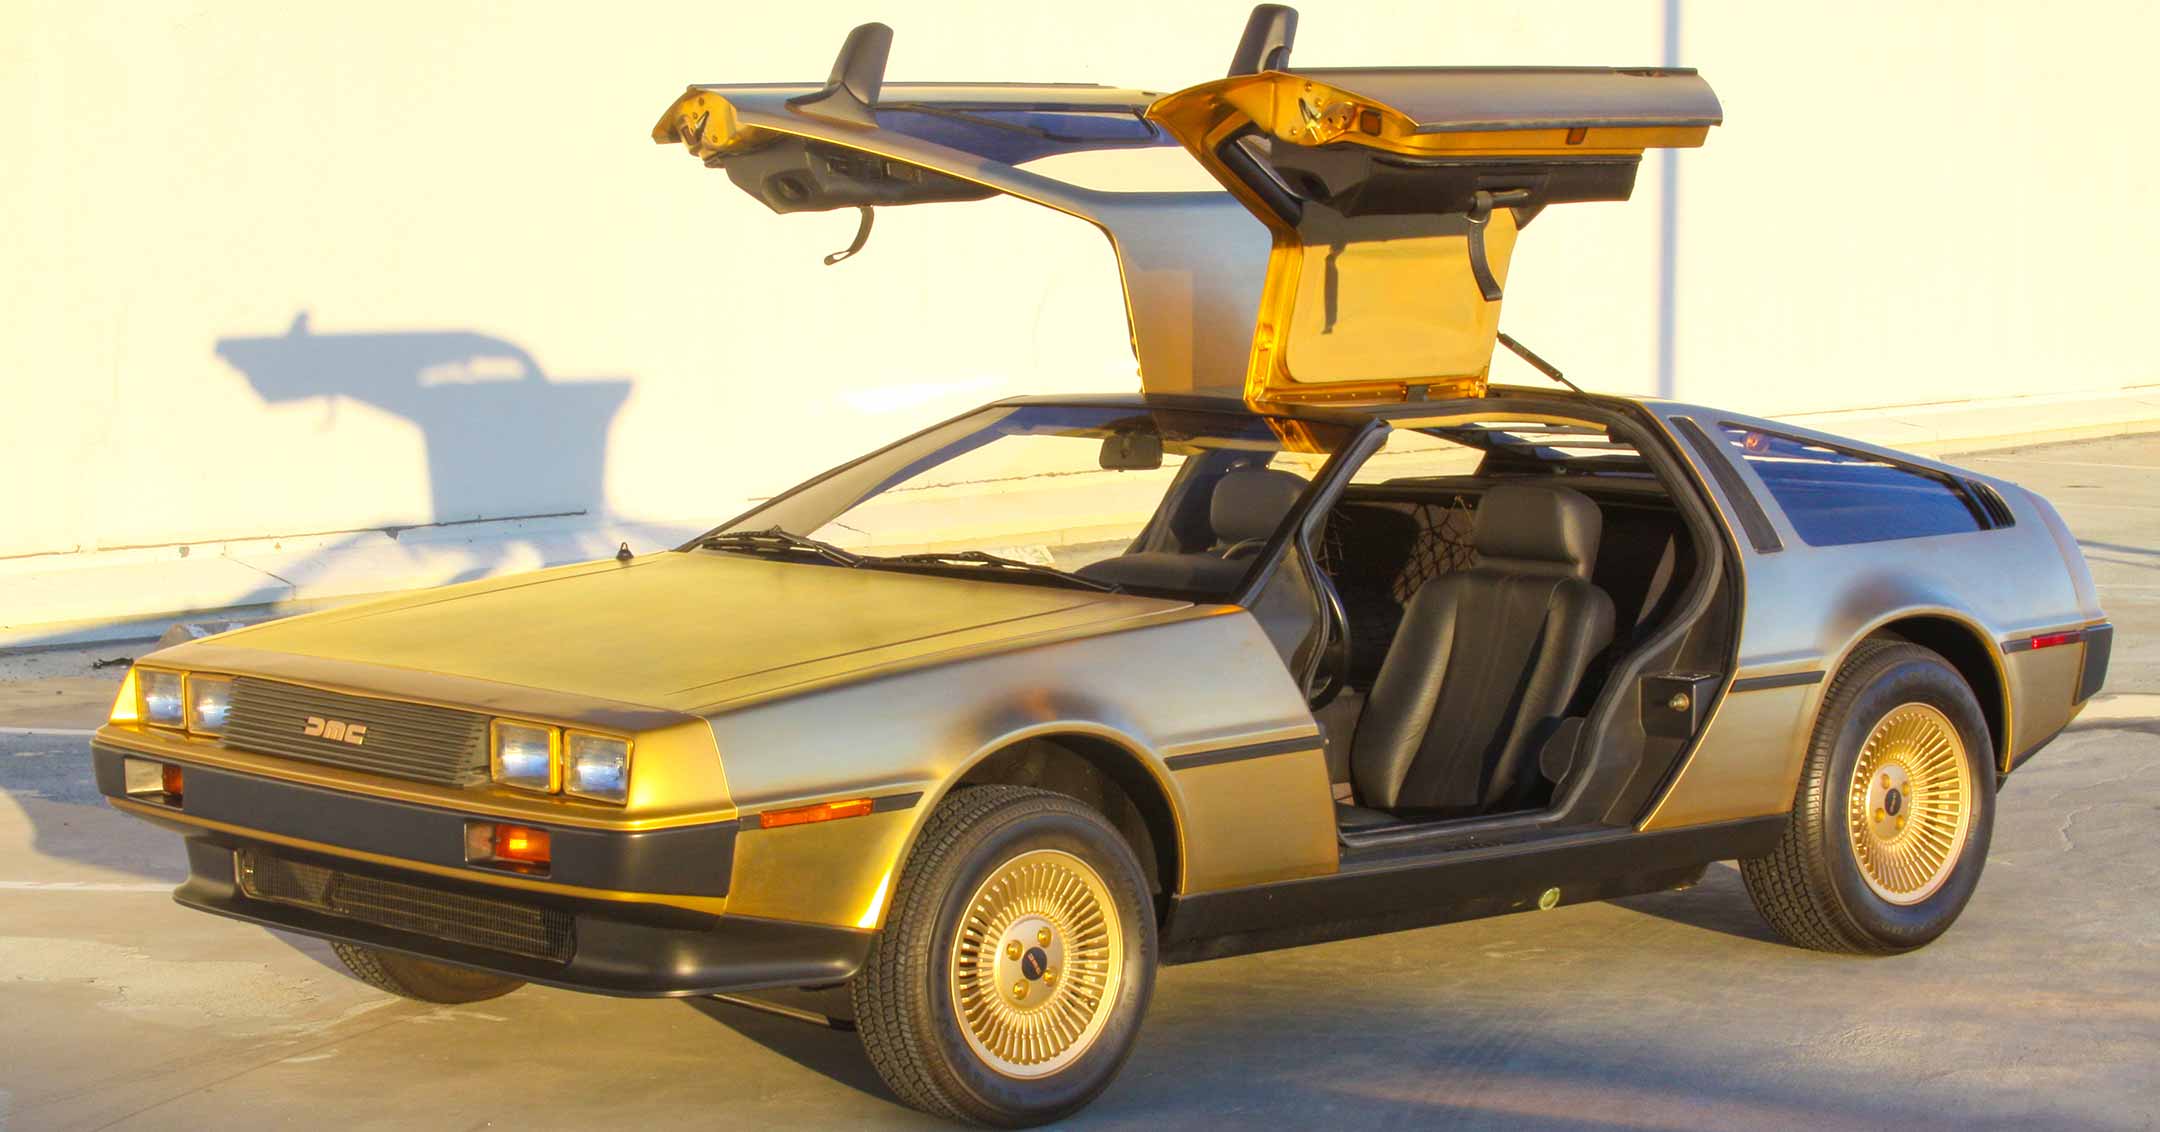
by Barrie Wills, with acknowledgements to Stuart Craven, Nick Sutton‘s book The DeLorean Story, the Sunday Times newspaper, and the DeLorean Motor Company website. In the fall of 1980, John Z. DeLorean was in Dunmurry for one of his ‘in and out’ day visits, and all seemed quiet, as everything at this stage by our standards, seemed to be going reasonably smoothly. Everyone in the company was working flat out. The peace was broken when director of manufacturing George Broomfield, director of engineering administration and quality, Mike Loasby and I were asked to join John Z and managing director Charles K. Bennington in the boardroom. We arrived with hastily written crib sheets, from which we could update the chairman on our respective progress. John Z was at his most convivial when we opened the conference room door and filed in. He went straight to the point and told us the American Express Christmas Mail Order Catalogue had the largest circulation of any across the US. How interesting, I recall thinking. He went on to astonish us all by announcing he had finalized a deal for its front cover to feature a picture of a gold DMC-12. That’s good, we thought. Then came the punchline: ‘ … and inside we will be offering to sell 100 24-carat gold-plated cars at $85,000 each to the first comers.’ We stared at each other in disbelief. It was not as if we hadn’t enough to do, without a side issue of this magnitude to account for. But this was for real, even though New York-based DeLorean PR chief Mike Knepper thought the idea came from John Z’s interior decorator Maur Dubin. John Z was not joking – the deal was done. The cars were to be delivered to the lucky buyers by October 1981. My mind went back to my youth. I had grown up at the bottom of the hill leading to the Daimler factory in Radford, Coventry. I remembered the ‘jungle drums’ doing the rounds when I was about 13. Somehow, we local urchins got to know when the chairman of Daimler’s wife, Lady Norah Docker, was about to appear in her Daimler DK400 Coupe, complete with seats trimmed in natural zebra hide and gold-plated bright body fittings. We would congregate until it passed us. That car’s components were only 14-carat gold. Cheapskate! Once the three of us had left the boardroom, we all agreed no one would be crazy enough to buy one. So we could get on with the job and wait for it to go away. But it didn’t. By the Spring of 1981 we were shocked to learn from John Z that two cars had been ordered – not 100, fortunately. In a way though two were as big a problem as would 100 have been as no-one had a clue whether stainless steel could be gold-plated successfully. We also learned the front and rear fascias and road wheels were to be painted a ‘matching’ gold colour, and that specially-designed exhaust tips manufactured by trusted supplier Prescott Powell, wheel nuts, door hinges, rivets for the door seals, other visual small metal pressings, and the aluminium front DMC logo were required to be gold-plated too. Knowing it had been impossible to match a silver painted fascia with the normal grained stainless steel, an ‘executive decision’ was made to ask the fascia supplier Phoenix to paint three (including a spare set of course) to an acceptable contrast in line with the policy adopted for production cars. A deal was also negotiated with GKN Alloys for the painting of three sets of road wheels to a ‘gold’ colour to compliment the plated skin panels. As the gold-plating of the grade 304 stainless steel was to be the most demanding element of the process, after I consulted with production purchasing manager Nick Sutton in the Coventry office, senior buyer Stuart Craven, the most technically-qualified of the Coventry purchasing team, was given the job of leading the project. He was supported by Len Nelson of quality engineering; Martin Mail, our new product planning manager; and George Fraser of material control manager Martin Graham‘s material handling team. Stuart undertook a review of gold-platers in the UK and mainland Europe, quickly finding out hardly any had the processing equipment capable of plating the size of panels in the DeLorean’s body shell. Very soon he focused his attention on the well-proven plating expertise of the large German chemical conglomerate Degussa. Degussa’s payment terms demanded the gold itself should be paid for up-front. I swallowed hard, conferred with director of finance Joe Daly and financial controller David Adams, and agreed to pay the $45,000 that represented, at the same time as Nick Sutton’s team’s order was placed. Despite their impressive facilities, a larger purpose-built plating vat was required, estimated to cost $37,000. By comparison, the plating process itself represented a meagre $15,000. In view of the number of unknowns relating to the likelihood of success, Degussa went the whole hog and asked for a total (including ancillary costs) of $131,000 up front. All for three sets of panels and door assemblies, one each for the two cars bearing a selling price premium of $60,000 each, and a third in case anything went wrong and if available – as most did – to be held as spares in Irvine, California. The only concession we managed to negotiate was that of a refund for any gold left over in the vat after plating – small mercies – and a chance perhaps to make up for the nett loss (before labour and overhead costs at Dunmurry) of $11,000. As Stuart got deeper into discussions with Degussa, it became clear they were more than sceptical about the likelihood of success. To Stuart’s shock they asked whether the plating could be carried out at Dunmurry to avoid damage to the panels after plating – with them providing the process know-how, the electrolyte solution, specialist platers and other processors. Stuart didn’t bother to
They All Look The Same… But they Aren’t
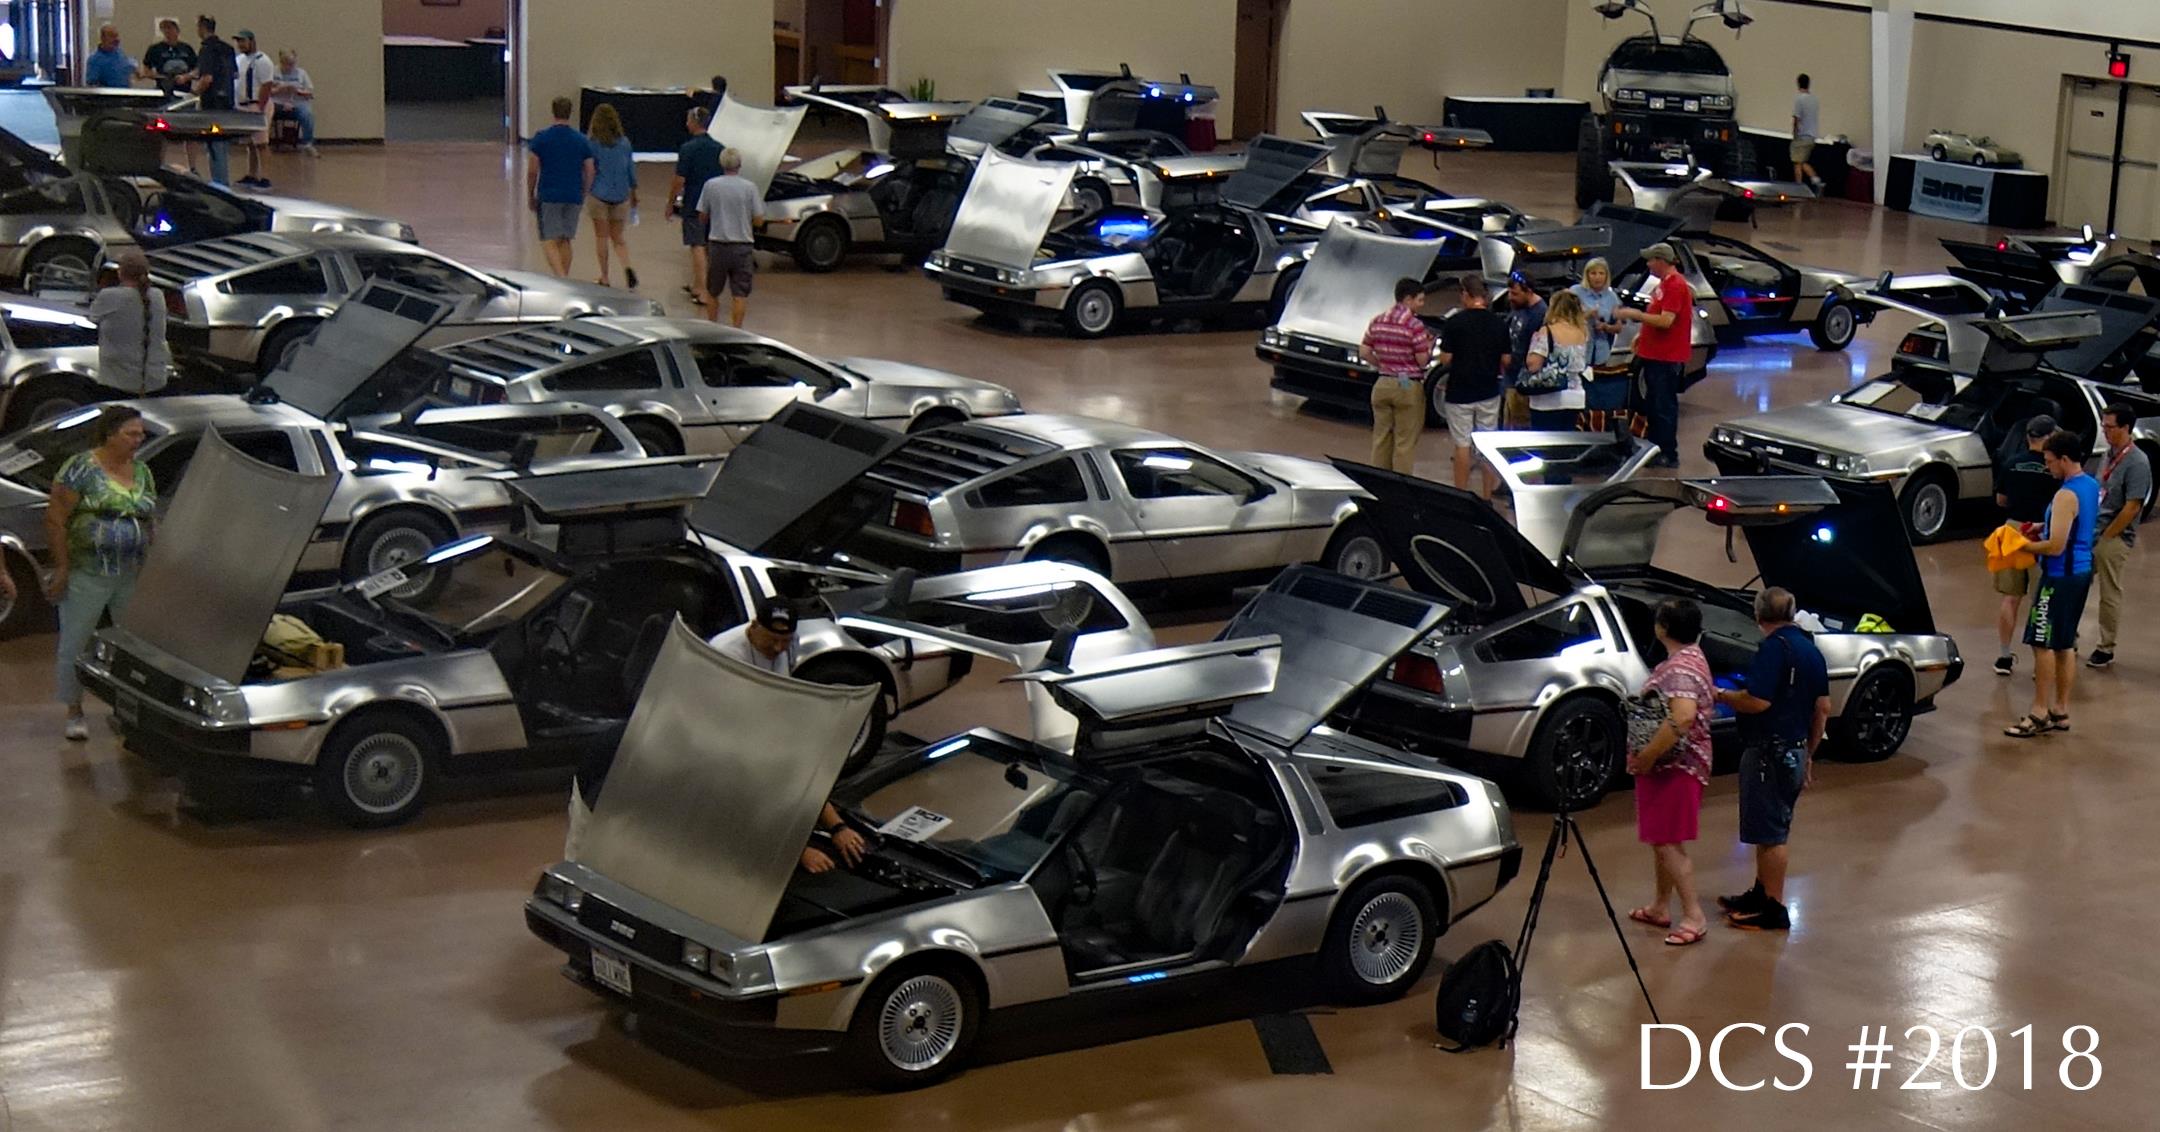
by Gordon Carpenter (DMC #10987) & Dara Solo More than 50 DeLoreans attended the 2018 DeLorean Convention and Show at Pheasant Run Resort in St. Charles Illinois. While glancing at all of these gleaming beauties, one might say ‘They All Look The Same’… But they Aren’t! I took it upon myself to find and photograph the ‘Custom’ of every DeLorean at the show, and ended up taking over 300 photos! Personalizing your DeLorean while maintaining the key design elements has always been my passion. I was happy to discover that many of the participants at the 2018 DCS have been very creative in adding their own unique touches. Here are a few that caught my attention… VIN 01115 Owner Unknown (can anyone help here?), gave 01115 an interior makeover that grabs your attention like no other. The seats have been recovered with a soft, velvety, textured material. The Binnacle, dash center console, and shift boot have all been recovered in a red vinyl. The center console instrumentation has been redesigned to include a Double DIN stereo head unit, bright stainless steel knobs to control the AC, the stock manual shift ball has been replaced with a stainless steel knob, and the ashtray has been transformed to a cup holder. Last but not least, the steering wheel and turn indicator housing were painted red to match. From any angle, this interior is beautiful! VIN 05180 Owner: Dennis Schlieckau outfitted 05180 with custom luggage from www.HillsAliveLuggage.co.uk that goes perfectly with the DeLorean styling. Dennis elected to remove the spare tire and position the first piece in the now-empty well. Then two identical primary luggage pieces, beautifully tapered to fit our unique trunk, are positioned above the circular luggage piece. Hills Alive added a snap-on bag to utilize the space opposite the gas fill protrusion. All four pieces fit perfectly in the trunk space! And there is more… Behind the two passenger seats, two more suitcases expertly fit on the parcel shelf! I estimate that Dennis and his wife could easily take a 3-week vacation and never have to visit a laundromat on their travels! VIN 10205 Owner: Matt Slaw has a great example of a fully painted DeLorean. I love painted DeLoreans as much as I love the Stainless body. In every case I have observed, the front and rear fascias blend better with the body panels on painted cars, creating the illusion of a wider stance. While listening to a recording of a John DeLorean interview, presented by John Lamm at the 2018 DCS Tech Talks, we learned that painted DeLoreans were definitely on the horizon, maybe as early as the 1984-85 production run. This fire engine red paint job is amazing from any angle, and I am sure that it would have received two thumbs up from John DeLorean! VIN 03513 Owner: Kolin Brown has decorated his car with cool vinyl graphics from a collection of automotive sponsors, giving the car a NASCAR vibe. Additionally, this DMC-12 sports a ‘ground effects’ kit that completes the race car package. VIN 10270 Owner: Luke Sandel drives 10270 on RAYS Volk TE37 wheels that are very popular with performance enthusiasts. Custom wheels for a DeLorean are not a simple task considering how unique the dimensions of stock DeLorean wheels are! I know, as I have been searching for my ‘holy wheels’ for a decade or more! The wheels chosen by Luke are especially interesting because of the contrasting style and color. Even with 10mm wider tires (205 and 245), approximately 4 lbs. per wheel of weight savings is realized. Luke has upgraded 10270 with a single water-cooled Garrett T3 ‘Mr. Turbo’ feeding the stock Delorean engine. At 6 pounds of intercooled boost, Luke is experiencing approximately 170 HP at the wheels. At the heart is a Megasquirt 3 sequential EFI system, providing boost control and safety monitoring of air/fuel ratio, boost level, and engine knock. Boost begins at 1800 RPM providing seamless power during any driving condition. For long range trips, 30+ MPG is obtainable at 70MPH. VIN 06138 Owner: Diane Bailey’s 6138 has a trunk that is worth seeing! The carpet has been replaced with a well-fitted piece of plywood sporting a large DMC logo. Then you will notice that the whole trunk has been coated with a ‘LineX – Rhino Lining’ style coating. What a beautiful surprise for a part of the DeLorean that is usually overlooked. VIN 10410 Owner: Nathan Schmucker rolls 10410 on four custom wheels that we may be seeing a lot more of. These wheels are just like the stock 14”/15” front/rear DeLorean wheels, except that they are 17”/18” in diameter. DMC Houston currently offers these ‘Billet’ wheels on a ‘custom-made and non-cancellable order’ basis. Nathan has swapped the stock DeLorean engine for a Toyota 2JZ Supra engine, a 3.0 liter turbocharged inline 6 cylinder that delivers an amazing 400hp at the wheels! Affectionately known as “2JZD”, it was owned by Nathan’s father, the late Cliff Schmucker. Cliff made many upgrades including a computerized engine management system, a digital RPM relay, 11” vented and slotted brake rotors, upgraded gas shocks and adjustable rear lower control arms. Even in a room full of DeLoreans, this car is an attention-getter! VIN 10574 Owner: Dennis Adams’ 10574 rides on four customized DeLorean wheels. Dennis shared that he first stripped the wheels of all paint, then powder coated each entire wheel. Later he had each wheel machined to expose the bright metal shown in the photo and finish each wheel up with a thin clear coat. The black paint of the DeLorean body and the wheels are stunning together. VIN 07104 Owner: Eric Weber has an amazing stereo/audio system installed in 7104. The amplifier is the largest I have ever seen and occupies a good portion of the trunk. Behind the seats and beautifully installed in a sculpted cabinet, are two speakers obviously capable of handling the output of the amplifier in the trunk. I can only imagine the abilities
There are NO “Factory Painted” DeLoreans
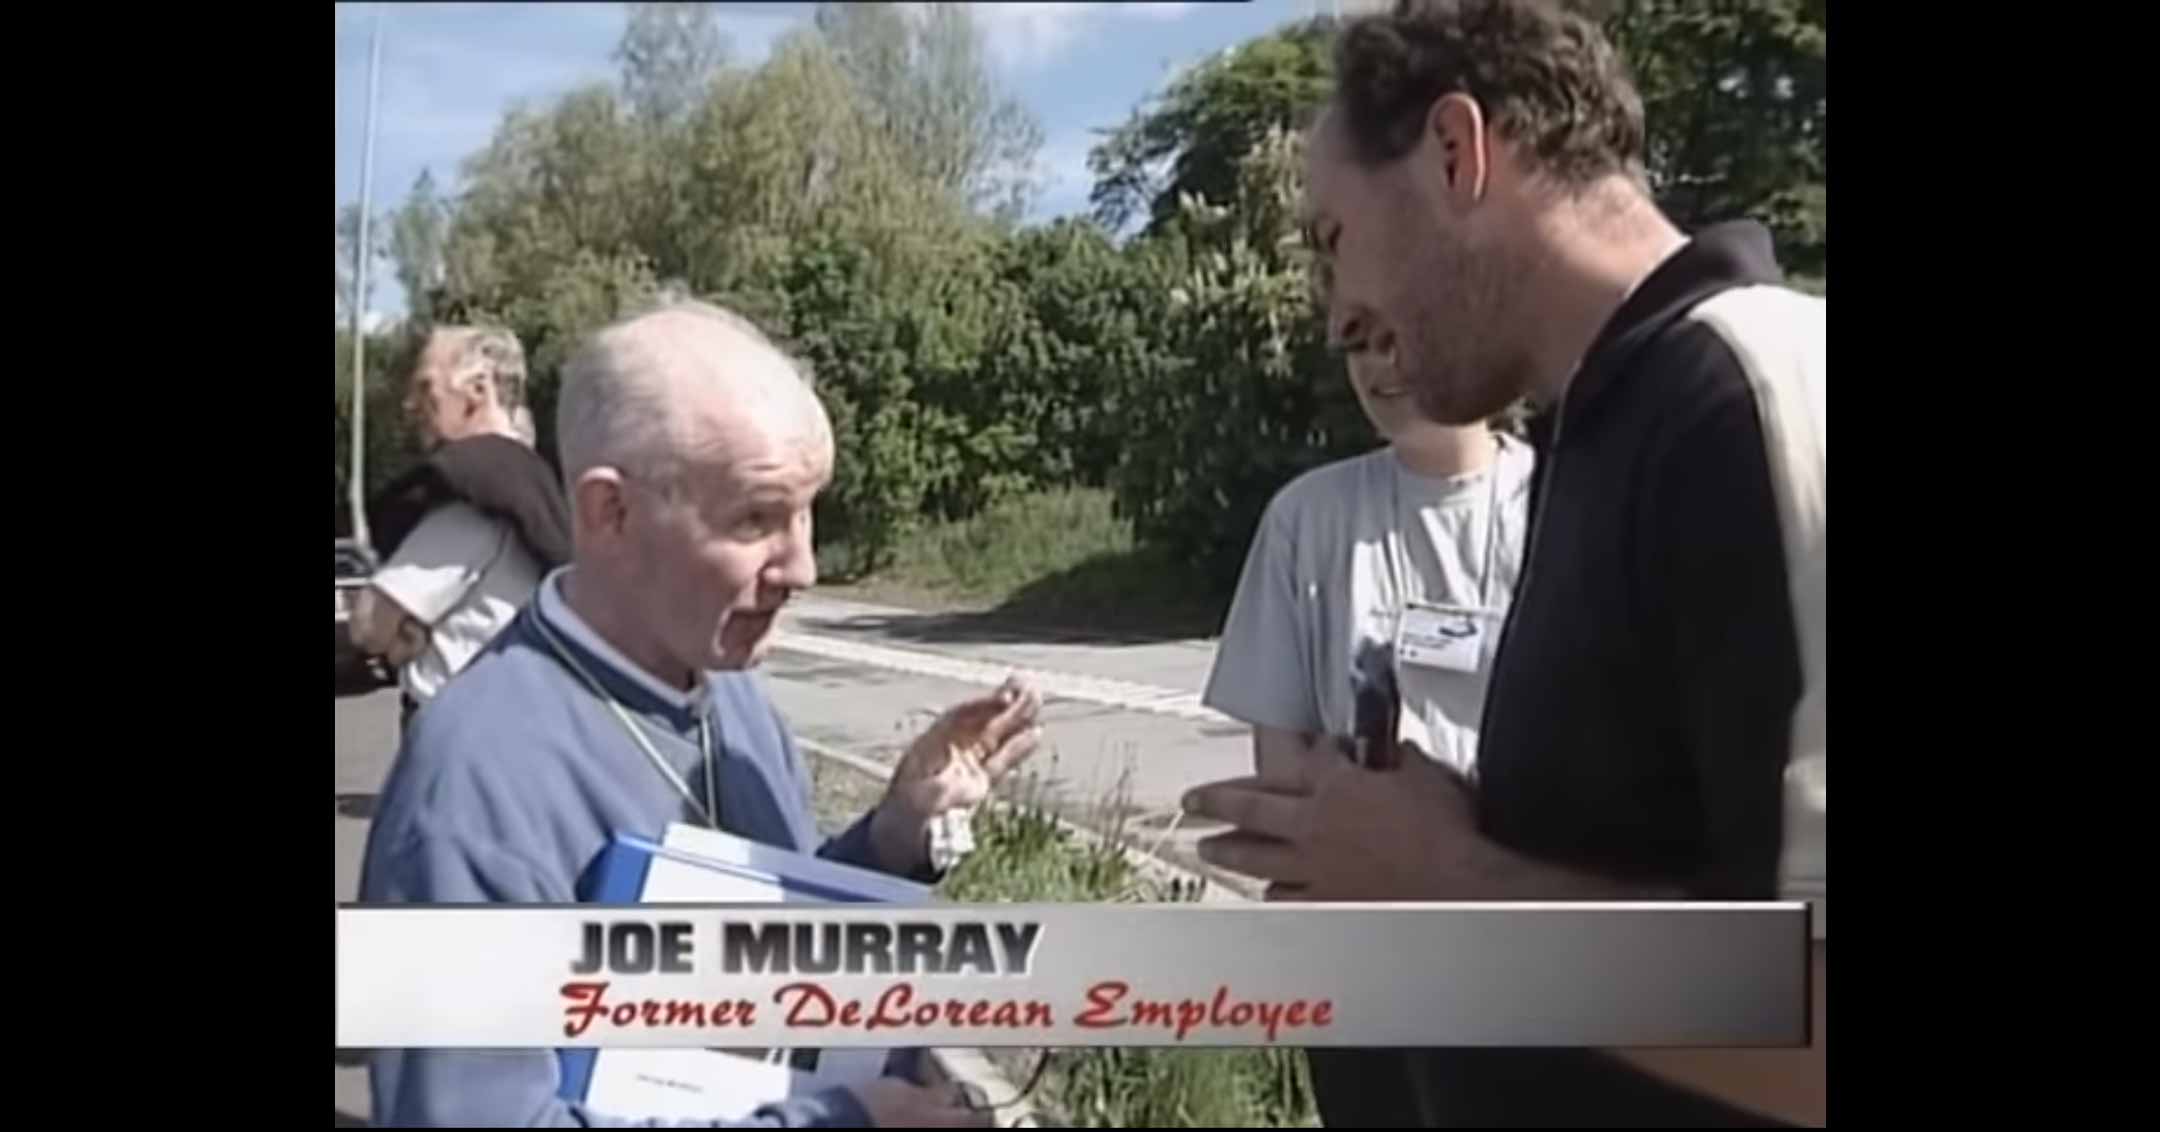
There are many DEALER painted DeLoreans out there, but according to Joe Murray, the person in charge of painting at the DMCL factory (at about 16 minutes, 51 seconds in this video): “There was never, never ever, a DeLorean motor car painted in this factory. Anything that was painted in this factory, I painted. And there wasn’t any cars, wasn’t a DeLorean car painted. Every car that left here was stainless steel.”
90 Degree Fuel Filter Fitting
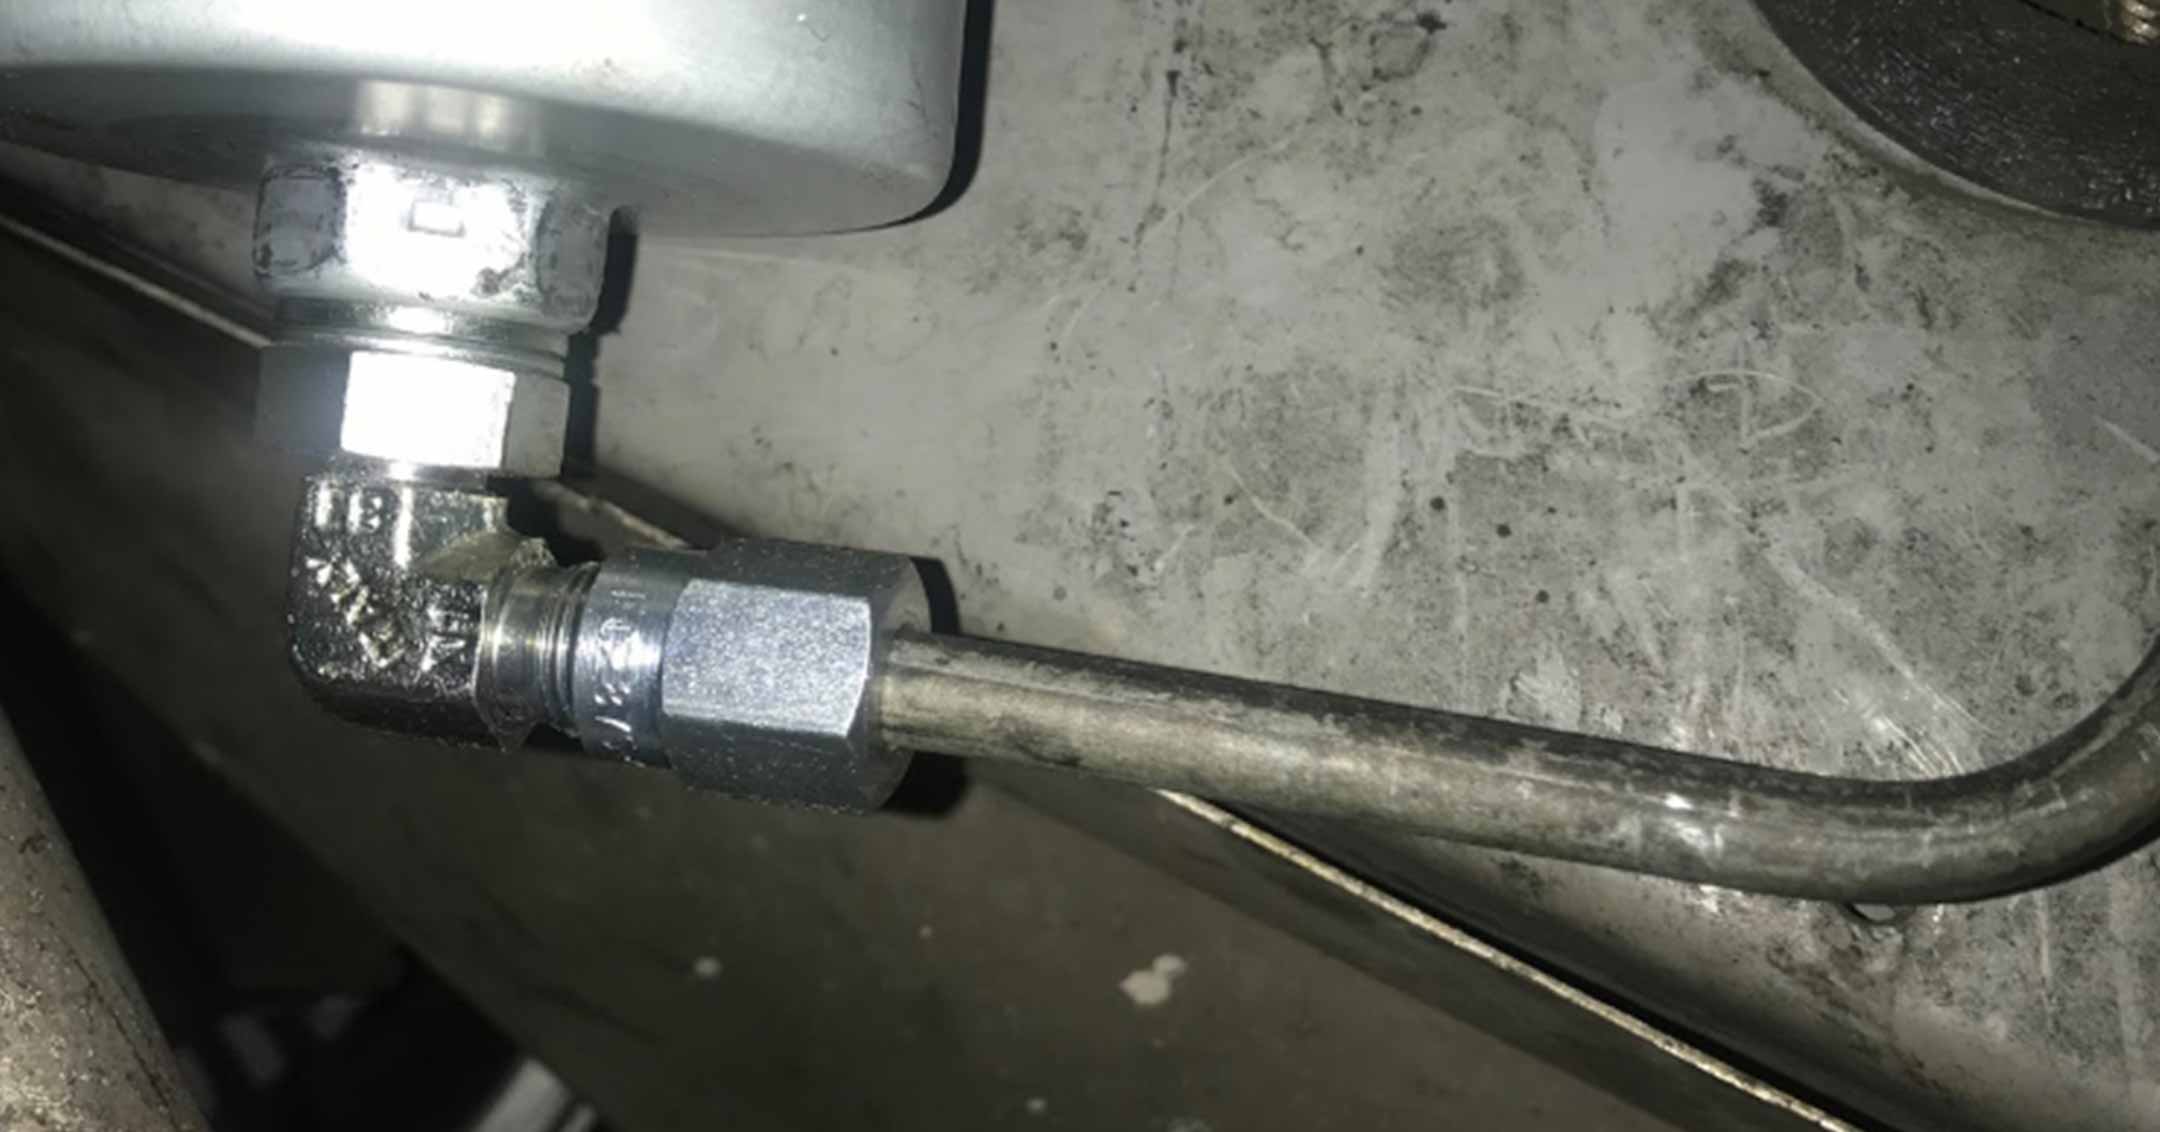
by Ryan Foster (VIN #06668) Have you installed a new fuel filter, just to start up the DeLorean and see fuel pouring out from the filter that you just installed? Well, that stock 90-degree fitting is usually the culprit. I recently experienced this problem myself. When I was installing the new fuel filter, I cranked on the compression fitting, and for the life of me could not get the hard line that goes into the filter to stop leaking. So, I got in contact with Josh at Delorean Performance industries (DPI) and he told me he had an updated 90-degree fitting that can be reused, and doesn’t need to be so tight. I ordered it right away. The kit comes with a new fuel filter, the elbow and copper washers needed to install. Part number 100523K. Below is a pic of the new elbow installed. The kit is very easy to install. Just install the elbow to the filter. No thread sealer needed. Install it dry. You’ll need a small tubing cutter (picked up at a local hardware store) to cut the end of the hard-line off as close to the end as possible. WARNING: Do not use a grinder or a cut off wheel as you will create heat and sparks and there is fuel in the line. The old elbow off the car looks like this: You can see how much of the line had to be removed to get the compression fitting off. The new elbow is reusable, and if you need a new compression fitting, DPI sells those too. Job takes about 45 mins tops using basic tools.
DeLorean Owners Manual Disambiguation
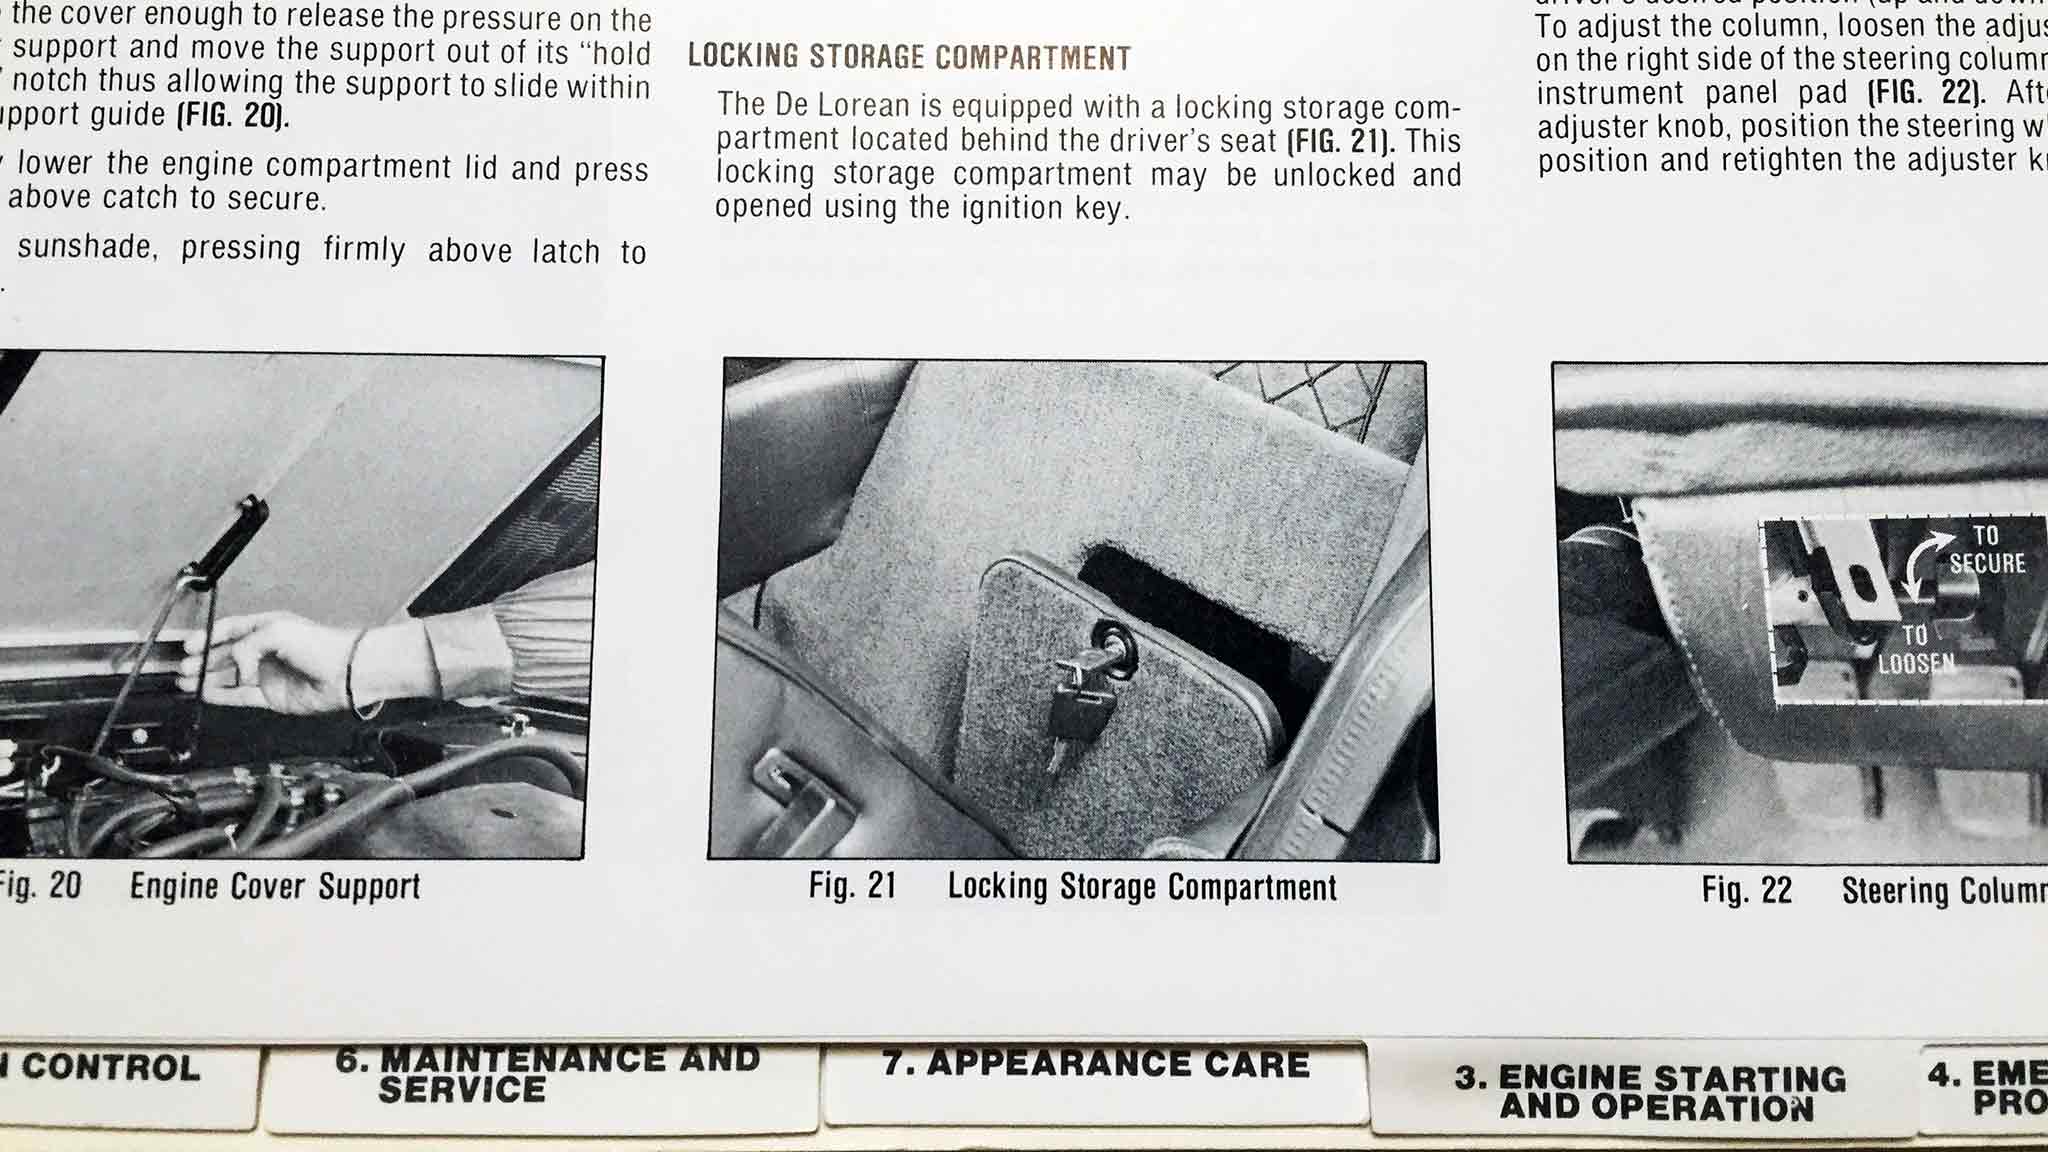
by Chris Miles Did you get an owners manual with your DeLorean when you bought it? Did you know the owners manual is unique to the model year? There are actually three different versions of the owner’s manual (or Handbook). For 1981 models, DMC called it the “Owners Manual.” For the 1982 and 1983 model years, they called it the “Owners Handbook”, even though they all contained the same information. All 1981 model cars were supposed to ship with spiral bound owners manual. It featured black and white photographs documenting various parts of the car. The manual came in a pouch style valet case along with other documentation. When the 1982 cars rolled out, DMC had “cheapened” the manual by going to the booklet format, with simple line drawings, and calling it the “owner’s handbook”. It had a black cover with a graphic of the car and had beige accented pages. It came in a padded gatefold style valet case. These are reportedly harder to find as they did not produce as many. For the 1983 cars, there was a further simplification of the handbook. Now, there was no black outer cover and all pages were black and white. The next time you’re in your glove box, go check to see what version of the owners manual/handbook you have. If you don’t have one, DMC now offers a reproduction 1982/1983 style owners manual with a 1981 style valet case – or you can watch eBay for the original DeLorean owners manuals. All three types usually come up for sale. The spiral bound versions usually command a high price these days. Then there’s always the digital versions available around the web. 1981 1982 1983
What?! My Battery is Dead?!
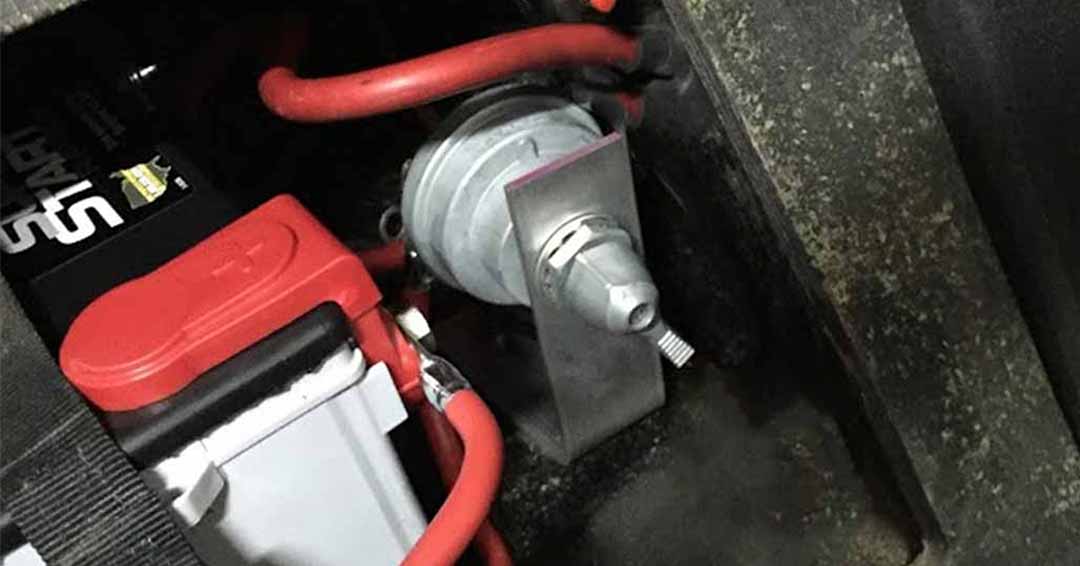
by Chris Miles Many DeLoreans suffer from vampiric battery drain if the car is parked for too long. How many times have you wanted to take the DeLorean out for a drive, just to turn the key and find out your battery is dead? The battery cut off switch is not a new idea. However, some of us probably have an inexpensive switch that we just live with. Others don’t have one at all. While it’s best to make sure you don’t have some underlying issue, a battery cut off switch will prevent your battery from draining if you do not operate your car regularly. Especially for owners who store their cars in the winter, a battery cut of switch is almost a must. It’s also a convenient way to disconnect the battery whenever you want to work on the car. I never like messing with the battery cables if I don’t have to. With a battery cut off switch it may also eliminate the need to have your car on a trickle charger. The Pollak Master Disconnect Switch is my favorite, as it’s a very heavy duty battery cut off switch that outperforms your run of the mill switch from Harbor Freight, or your favorite discount auto parts store. Pollak has been manufacturing these switches for many, many years. Over the span of production they have been made in the USA, Mexico, India, and most recently Taiwan. If you watch eBay, you can usually find New Old Stock USA made Pollak switches. Just beware of the cheaper Chinese knockoffs, as they do not have the Pollak stamp on them. Over the years many people have installed these switches by drilling a hole through the battery access door. I am not the biggest fan of doing this because I don’t want to damage the original battery cover. Or, the switch could rub or dig into the back of the passenger seat, which is more costly to repair/replace. I prefer to make a bracket to mount the switch inside the battery cubby. You will also need to buy one 2 foot battery cable to run between the battery and the switch. You can pick one of these up at your favorite auto parts stores, or on Amazon or from O’Reilly Auto Parts. For installation, I connect the positive battery cable to one stud on the switch. I then run the new 2 foot battery cable to the other stud.
To LoJack, or Not to LoJack…
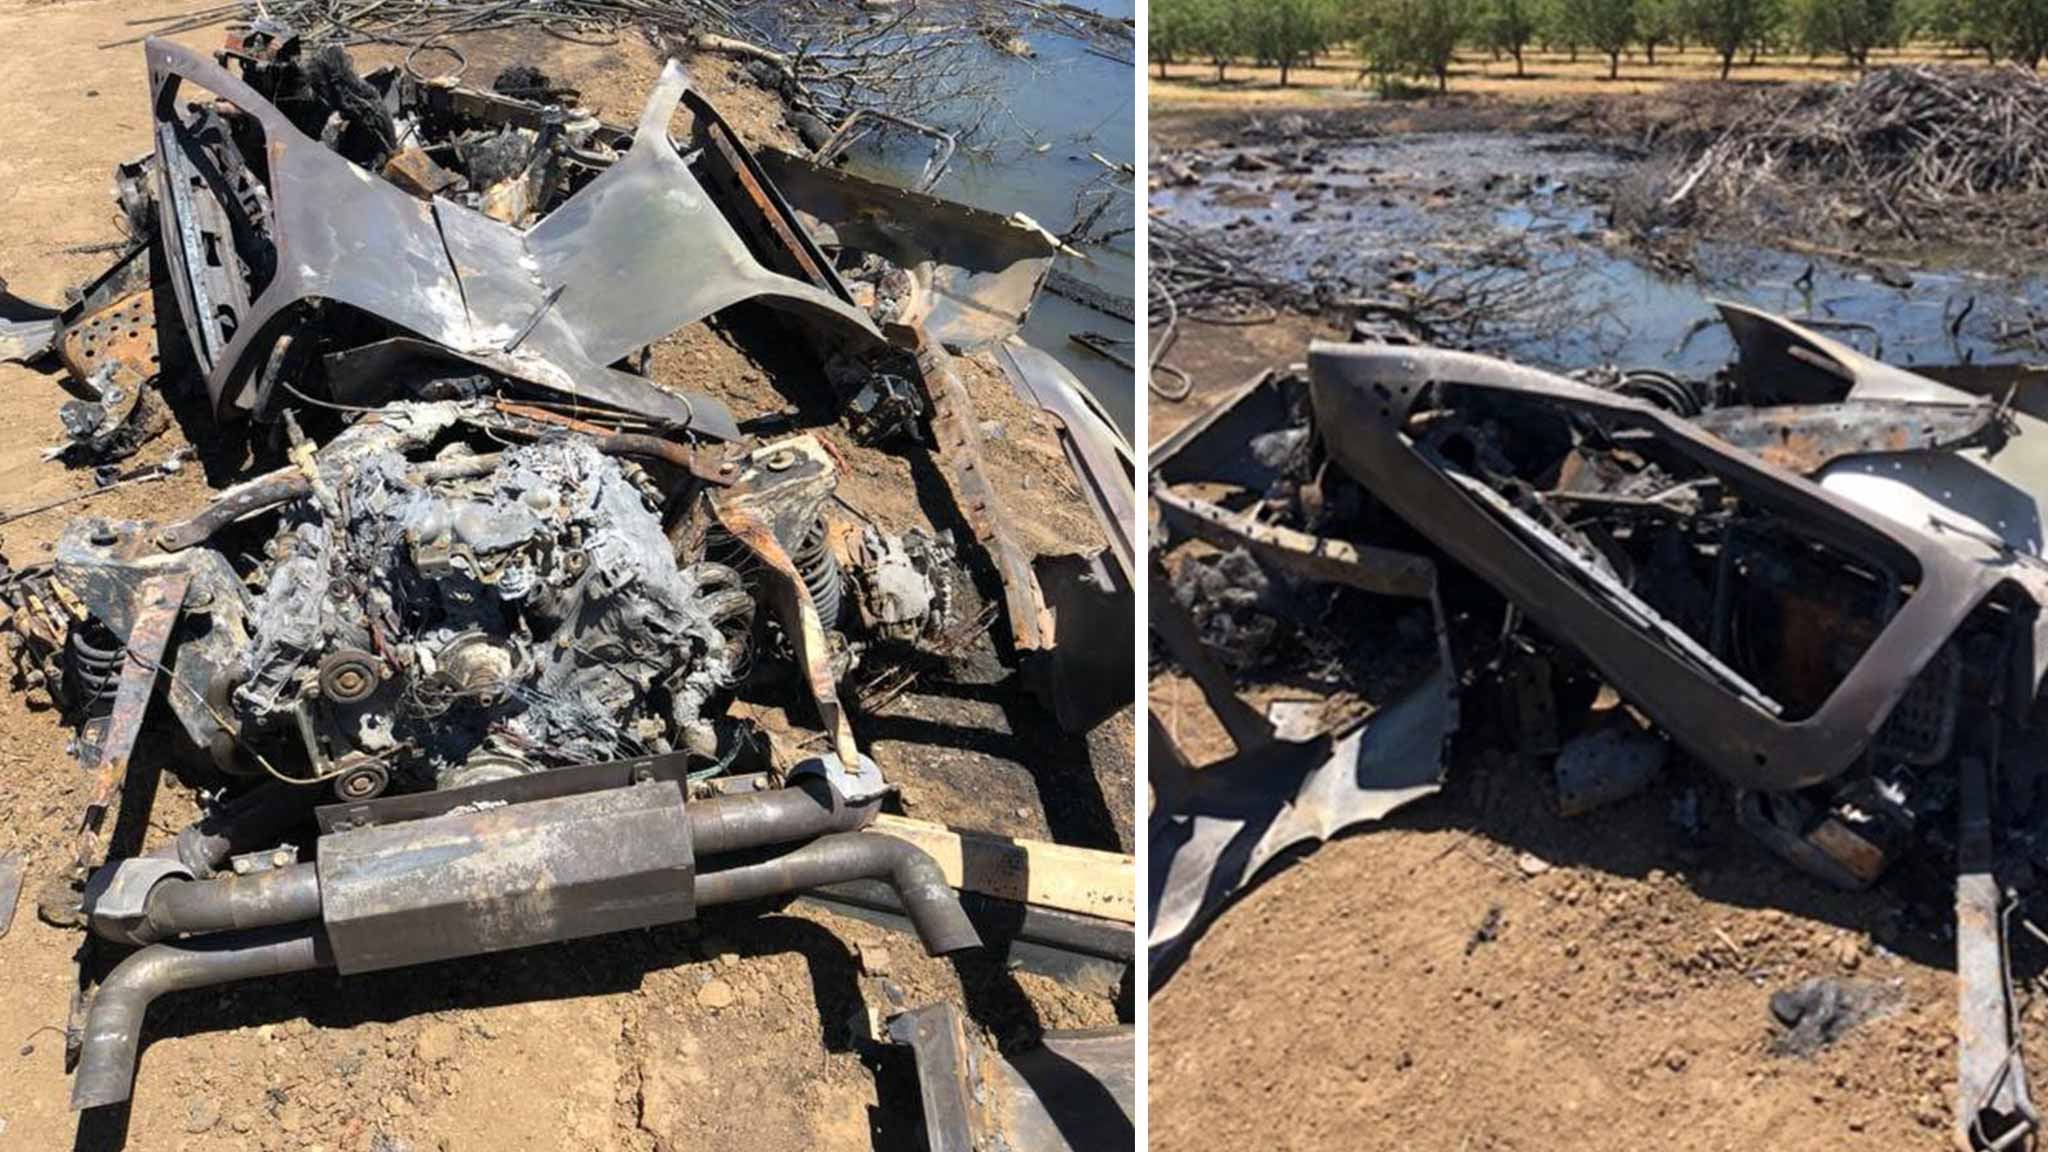
We all know that DeLoreans aren’t stolen… well… ever (statistically.) But as we recently saw with Mike Persyn’s truck being stolen, while towing VIN #05984, it can happen. And with only about 4,000 DeLoreans left in the world, the question is, should we consider installing tracking devices on our cars? Which is quickly followed up with, ‘Is it worth the money?’; ‘What devices should I consider?’; ‘What will it cost me over time?’ After looking at a lot of vehicle tracking devices and options, the short answer seems to be: LoJack. Q&A? Below is an email from June 5, 2018 directly from LoJack with details. (View the PDF of the email)
DeLorean RPM Relay
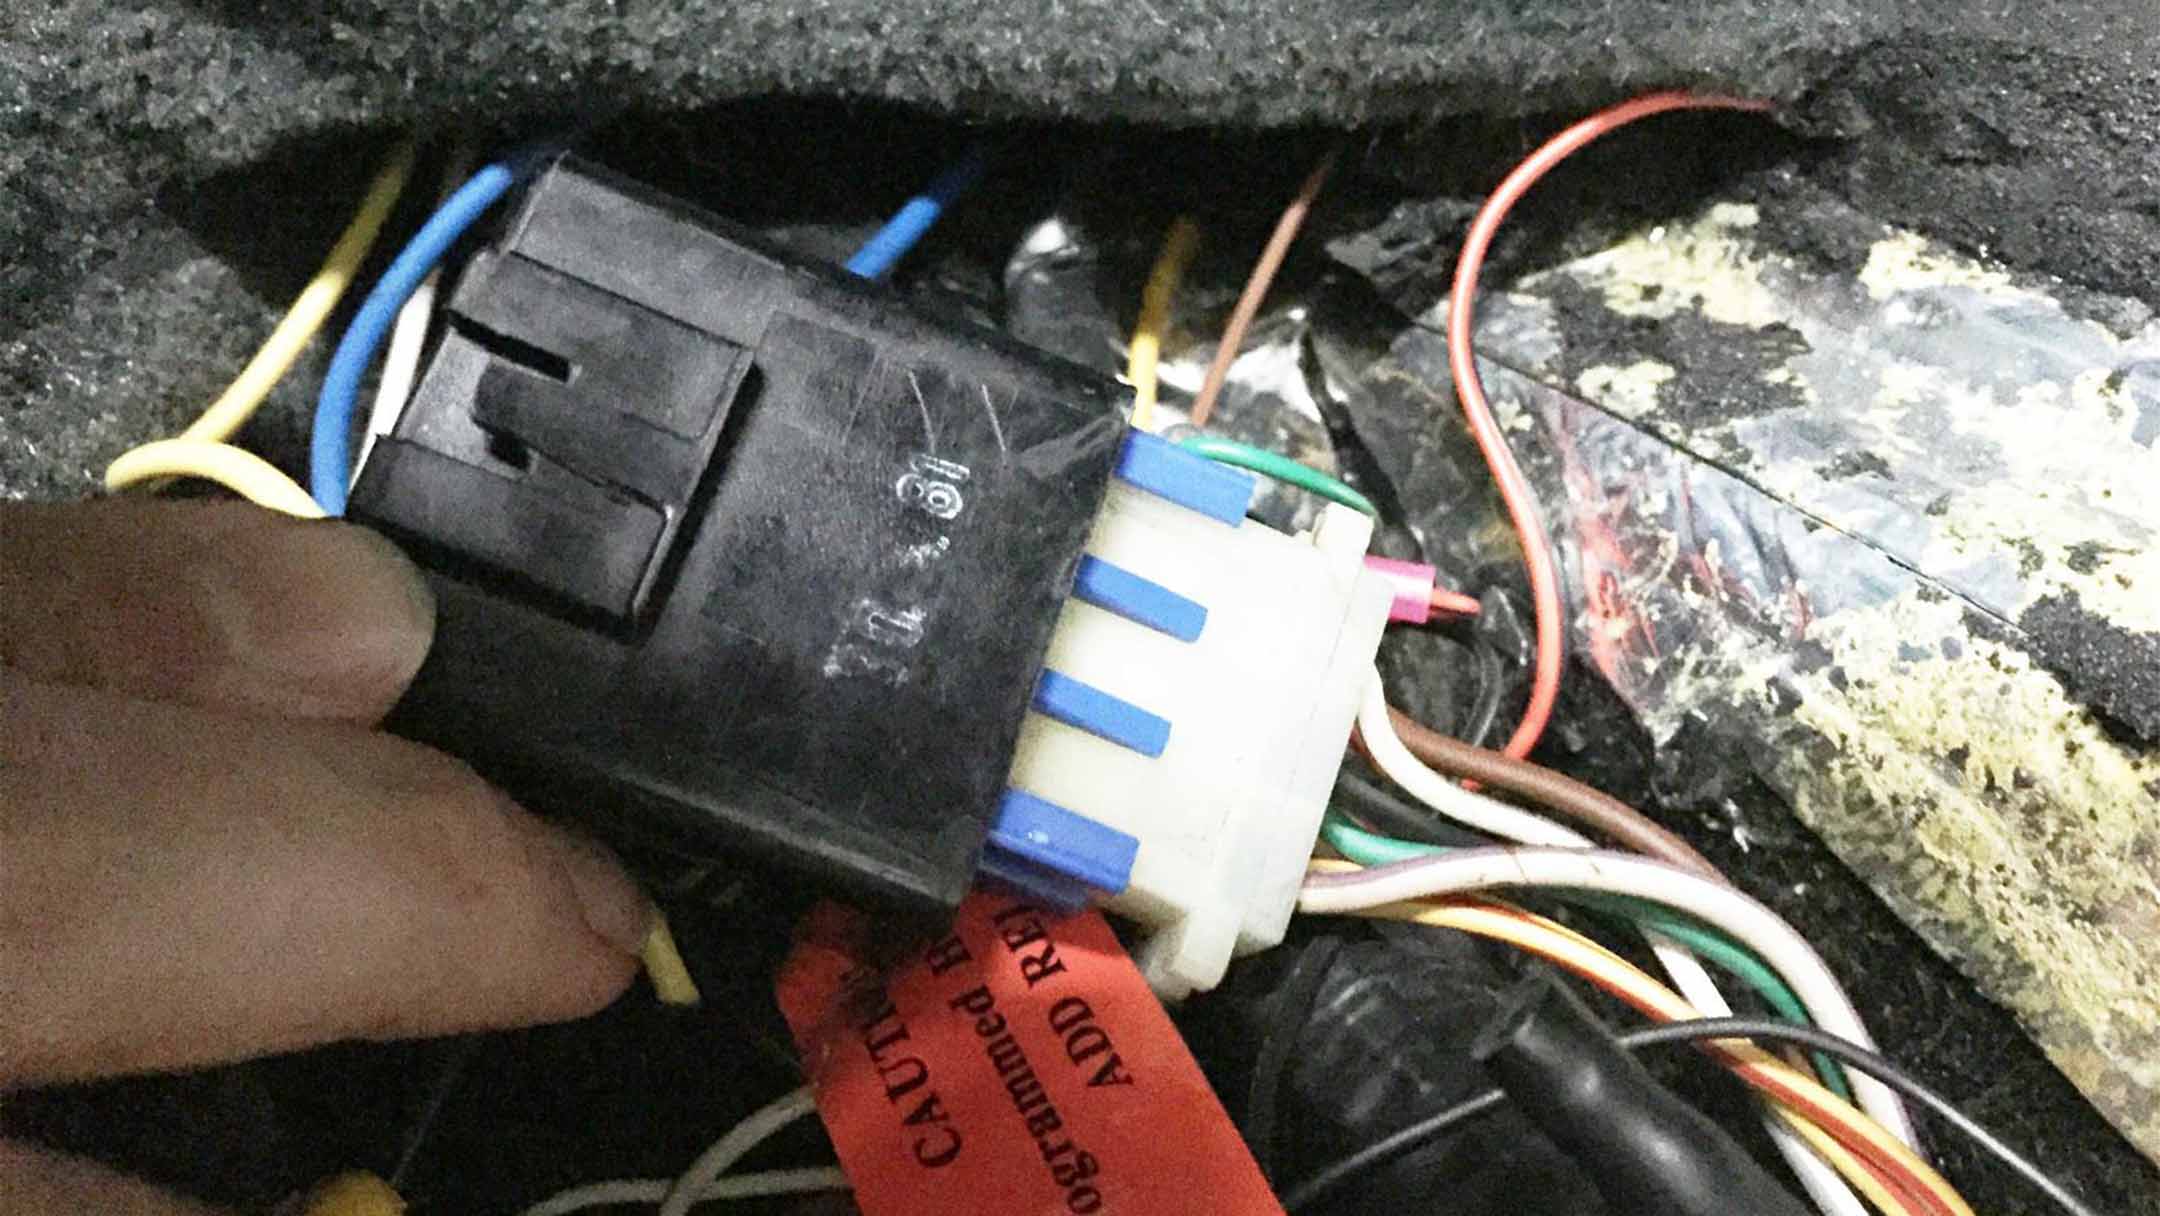
by Chris Miles The RPM relay is essential for fuel pump operation. It powers the fuel pump when it detects an RPM signal, meaning there’s an ignition signal, and the engine is turning over. It’s a black six pin relay usually found mounted to the underside of the relay tray behind the passenger seat. Or, just look for the large relay similar to this photo. If the relay fails, you can be left stranded, and you likely won’t get a warning of a failing RPM relay ahead of time. To avoid RPM relay issues, I recommend buying Dave McKeen’s solid state RPM relay (https://dm-eng.weebly.com – use the “Contact Email” link at the top of his page for pricing). Unlike the original RPM relay, McKeen’s solid state relay runs cool and will essentially last forever. Since the RPM relay is essential for running the car, why rely on a 30+ year old piece of technology. Dave will rebuild your original relay with solid state components, or you can send him a compatible relay to rebuild. Search eBay and other websites for Volvo relays. You can also go to junkyards and search for 1980s Volvos (commonly Volvo 240s) for compatible relay cores. If you send McKeen one of the Volvo relays, you can keep your original DMC relay as a spare. Alternatively, please see my for sale link here (RPM Relay Core),if you would like to buy a relay core from me. This photo gives you an idea of what to look for on the INSIDE of the Volvo relays. Make sure the pins “stacked” when they attach to the circuit board. Other relays cannot be re-used for McKeen’s conversion. I’ve been using these relays in both of my DeLoreans since about 2010 and they work great. If you don’t want to spend the money for McKeen’s relay, it’s not a bad idea to make a three-wire lead you can use to jumper the RPM relay socket in case of emergency. The three wires are all connected to each other at the top (so that they make a single circuit,) and when plugged in as the photo shows, the fuel pump circuit will be powered – allowing you to get home and buy a new RPM relay.
DeLorean Alternator Tensioner
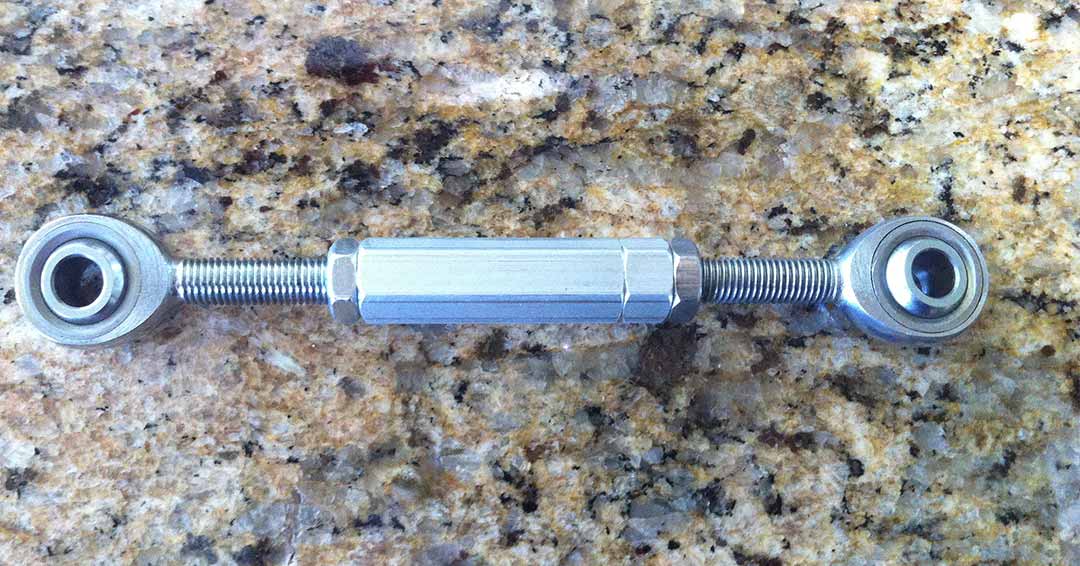
by Chris Miles If you’ve ever had to replace the alternator / water pump belt (or just adjust it,) you know what a pain it is – especially if you’re broken down on the side of the road! So, to make it easier, I have been using a turnbuckle style alternator tensioner. It’s made from parts sourced from McMaster Carr. You don’t need to install this now, but it’s a good idea to have it in your car, so that you can install it the next time you replace the belt. (You SHOULD have a spare belt in the car too – Gates #7495 – www.rockauto.com/en/moreinfo.php?pk=3913&jsn=10393) You’ll be replacing the existing alternator tensioner bracket (DMCT Part#: 110102) with this new tensioner. Here are the parts you’ll need to build this replacement bracket: Remember, you’ll also need a long enough bolt to go through the rod end into the alternator itself. Check your YOUR alternator bolt size, and get one about 1/2″ longer than the current size. The coupler accepts a ½ inch open-end wrench. Simply rotate the coupler to extend the tensioner, which pushes the alternator away from the water pump pulley, thus tightening the belt. I’ve been using these on both of my DeLoreans for years, and have never had an adjustment problem. At the time of this writing, the rod ends were about $14 each, and the coupler nut was $18. The jam nuts are probably less than $1 each. For about $50, you can have piece of mind that you can replace your broken or damaged alternator belt on the side of the road quickly and easily.
Don’t trust a DeLorean seller who won’t share the VIN

When you’re looking to buy a DeLorean and doing online research, don’t trust a business (or individual) that hides the VIN in their listing. VIN theft is a real thing – for mass-produced cars. Not for DeLoreans. There are no bar codes or ODB II computers in a DeLorean. No one is going to clone a DeLorean VIN. Therefore, there is no reason to keep a DeLorean VIN private/secret – unless you’re trying to hide information about the car. Any half-intelligent car dealer knows this, especially ones who deal with rare or classic cars. So the short of it is, if a dealer doesn’t, or won’t list the VIN of a DeLorean they are selling on their website, BEWARE! There are a few “car club” dealers around the world who frequently sell DeLoreans. Most of the time those cars are in bad to extremely poor condition. And most of those dealers only share their stock number on the listing, most likely to keep potential buyers from discovering the history (and sometimes the truth) about that vehicle. Some of these “car clubs” have refused to post the VIN on their listings citing potential VIN theft as the reason. To reiterate, that argument doesn’t work for DeLoreans. The dealer is more than likely just looking for a sucker to buy the car (for an inflated price.) So WHY is it important for car dealers and private owners to post the VIN of the DeLoreans they sell online? Because the community that surrounds the DeLorean is vast, and there are many, many people who follow these cars, and who know when something doesn’t look right. We’ll take care of our brand. We don’t want bad actors pulling scams with our cars. When someone is looking to buy a DeLorean, they almost always look on the web. When a car comes up for sale, other DeLorean owners can be a big help in making sure a potential new owner doesn’t get taken advantage of in the sale. Plus, on the extremely rare occasion of DeLoreans being stolen in the past, it’s the whole car – not just the VIN. Luckily, eBay requires the VIN when listing cars. Again, for mass-produced cars the VIN cloning issue is real. As of 2015, cloning theft cost Americans around $12 million each year. But that’s for mass-market cars that are stolen and can be folded into the mix of hundreds-of-thousands of the exact same car. That just doesn’t happen in the DeLorean community. Even the new DeLorean Motor Company lists the VIN (only the last 5 numbers matter) on the cars they sell. There’s no excuse, rhyme, or reason for a DeLorean seller to hide the VIN. Note to DeLorean sellers: At the very least, include the last 5 digits of the VIN. Better is to include the full VIN. Best is to have a photo of the door VIN plate. Do this, and your sale will go well.
DMC Columbus, OH
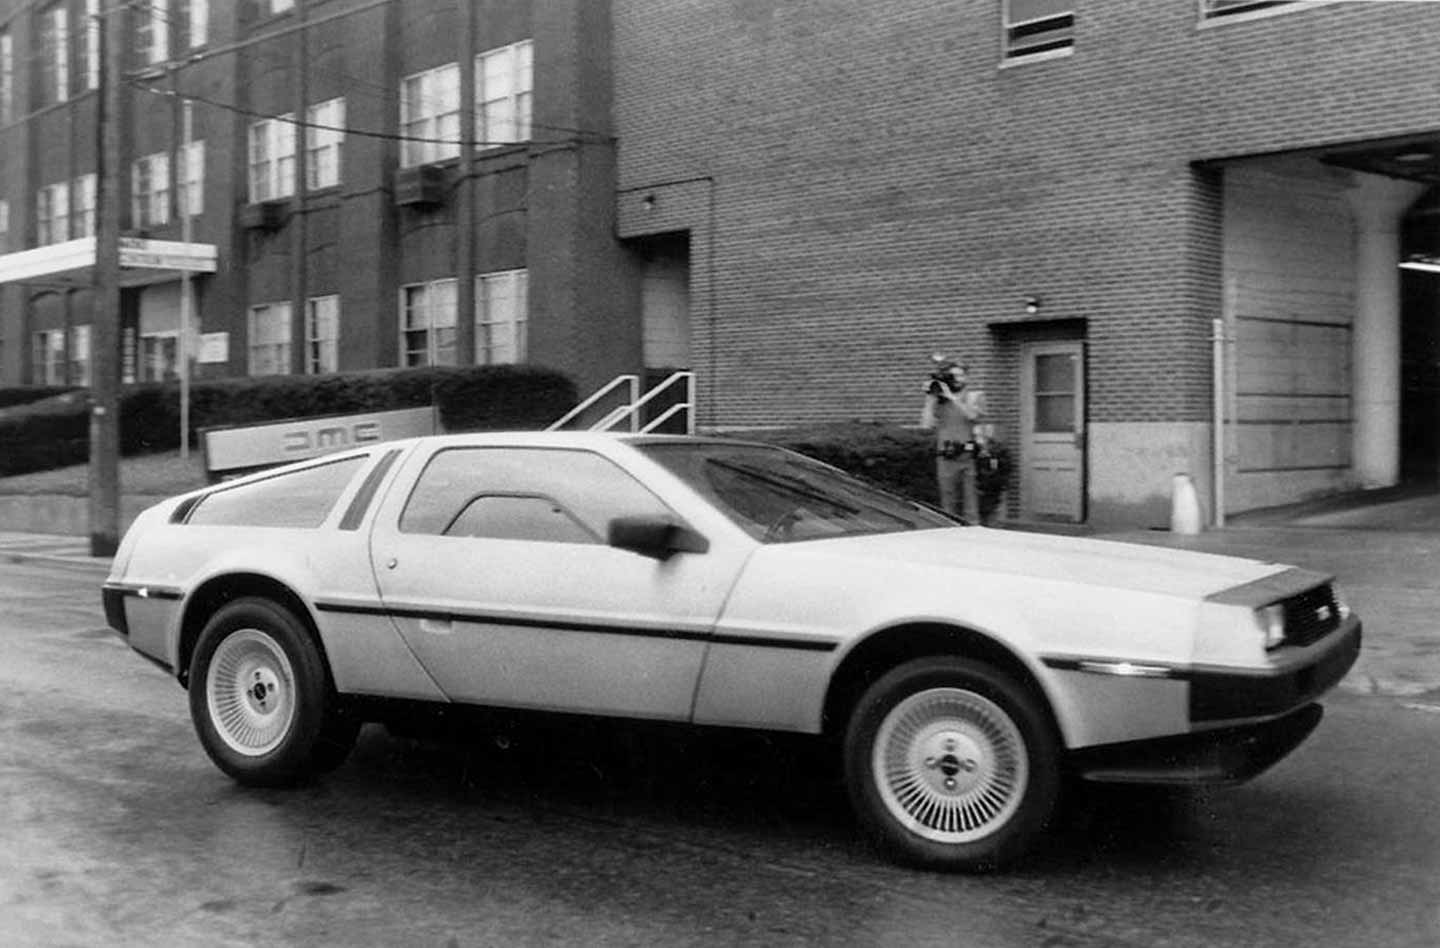
Google Street View: 394 W. Nationwide Blvd., Columbus, OH 43215 (Originally 400 Dublin Avenue) From Hemmings Daily – “When De Lorean moved to Columbus Daniel Strohl on May 17th, 2012″ When De Lorean moved to Columbus Daniel Strohl on May 17th, 2012 Columbus, Ohio, isn’t widely regarded as a center of automotive manufacturing, and rightly so: Of the 10 or so manufacturers that actually proceeded with automobile production in the city, all had disappeared by the mid-1920s and only about four of them built automobiles for more than a couple of years. Yet one company – DeLorean – thought Columbus would make for a fine place to build some cars call home in the 1980s. Yes, DeLorean built the majority of its cars in Dunmurry, Northern Ireland, before the company went bankrupt following the October 1982 arrest of John DeLorean on drug trafficking charges. According to a DeLorean Museum, DeLorean Motor Company built 9,200 DMC-12s in Northern Ireland between January 1981 and December 1982. Those latter months of 1982 proved a turbulent time for De Lorean, both the man and the company, but they also saw the arrival on the scene of Sol A. Shenk, a Russian immigrant to the United States, who in 1967 started a business selling closeout and overstock car parts; the business, Consolidated Stores, took off when Shenk switched to household goods and became the company that runs Big Lots and Odd Lots stores across the country. Following the demise of Malcolm Bricklin’s eponymous car company in late 1975, Shenk swooped in to buy its remains and sold off the 300 finished cars along with the leftover parts inventory. “He’s doing all right with Bricklin,” David Brownell told the New York Times years later. “He’s the sole source for Bricklin parts, and since parts fall off Bricklins with some regularity, it’s a good business.” Shenk and business partner Jerome Schottenstein wouldn’t wait until DeLorean went belly-up to invest in that company, however. In March or April of 1982, when Bank of America seized 1,400 DMC-12s because DeLorean hadn’t made payments on a loan, Shenk paid the bank $18 million and took a stake in De Lorean Motor Company. Then just days after John DeLorean’s arrest, Shenk hopped a plane to Northern Ireland to begin discussions about buying out the remains of the company. By mid-November, Shenk struck a deal, beating out the offer made by John DeLorean’s brother, Charles. Shenk would pay the company $1.5 million and assume another $8.7 million in debt and in turn receive $1.2 million worth of parts, the exclusive U.S. distribution rights for cars and parts, and $17.5 million worth of unsold cars. That appears to include 649 unsold DMC-12s, part of Shenk’s earlier investment into De Lorean, but the total number of cars seems to vary by source, anywhere from 1,041 to 2,800. Shenk initially said he wouldn’t liquidate De Lorean; instead, he intended to continue production on a scaled-back basis in Northern Ireland. “It’s a beautiful plant,” he told the AP in mid-November. “I think that there is an opportunity here to sell cars at a very good price. (John DeLorean) was a big man. I’m a little guy. All I want to do is sell cars.” Before the end of the year, though, he’d change his tune after analysts told him the car couldn’t be sold at a profit at the price DeLorean had previously been selling it. “I don’t think there’s much hope – there’s any hope – for the car being built,” he said. “I think it’s a wonderful car, and it’s a shame such a well-built car will not be able to be produced.” Almost immediately, Shenk began to ship the leftover cars and parts to the United States – specifically to a warehouse or two on Dublin Avenue in downtown Columbus. Discussion on some old De Lorean mailing lists indicates one of the warehouses was located at 319 Dublin Avenue, but thanks to PhotOhio.org – where we found these several photographs of De Lorean in Columbus – we see that the Columbus De Lorean operations centered around 400 Dublin Avenue, a very appropriate location. At least two of Columbus’s more successful auto manufacturers occupied that building: the Columbus Buggy Company, which produced the Columbus Electric, the Buggymobile, and the Firestone-Columbus from 1903 to May 1915; and Allen, which bought the property from he Columbus Buggy Company and operated out of that location from 1915 through 1922. From the new Columbus digs, Shenk then hired another company, KAPAC, to distribute the remaining DeLorean parts inventory. The remaining DMC-12s he sold off directly and through existing dealers. Shenk must have had more demand for the cars than he expected – according to DeLoreanMuseum.org, he hired former De Lorean factory managers to come to Columbus and assemble about 100 more cars from leftover components, including the very last DMC-12http://bigtexas.com/dmc/gold/, assembled from leftover gold-plated parts in 1983 and used for a promotional giveaway at Big Lots retail stores. Woman filling out an entry form for a drawing for the last De Lorean built outside a Big Lots store. How long it took Shenk to sell the cars remains unclear, but by September 1983, Shenk noted that he had sold about two-thirds of the cars and had only a few hundred left. Shenk died in 1994 and three years later KAPAC sold the remaining parts inventory, production and distribution rights, and engineering drawings to Stephen Wynne of De Lorean Motor Company in Texas, who in recent years has resumed De Lorean production much as Shenk did – by assembling cars from leftover parts. UPDATE (18.May 2012): James Espy of the Texas DeLorean Motor Company noted that the 100 or so cars that Shenk had built were built in Northern Ireland, not in Columbus.
ASI Radio User Manual
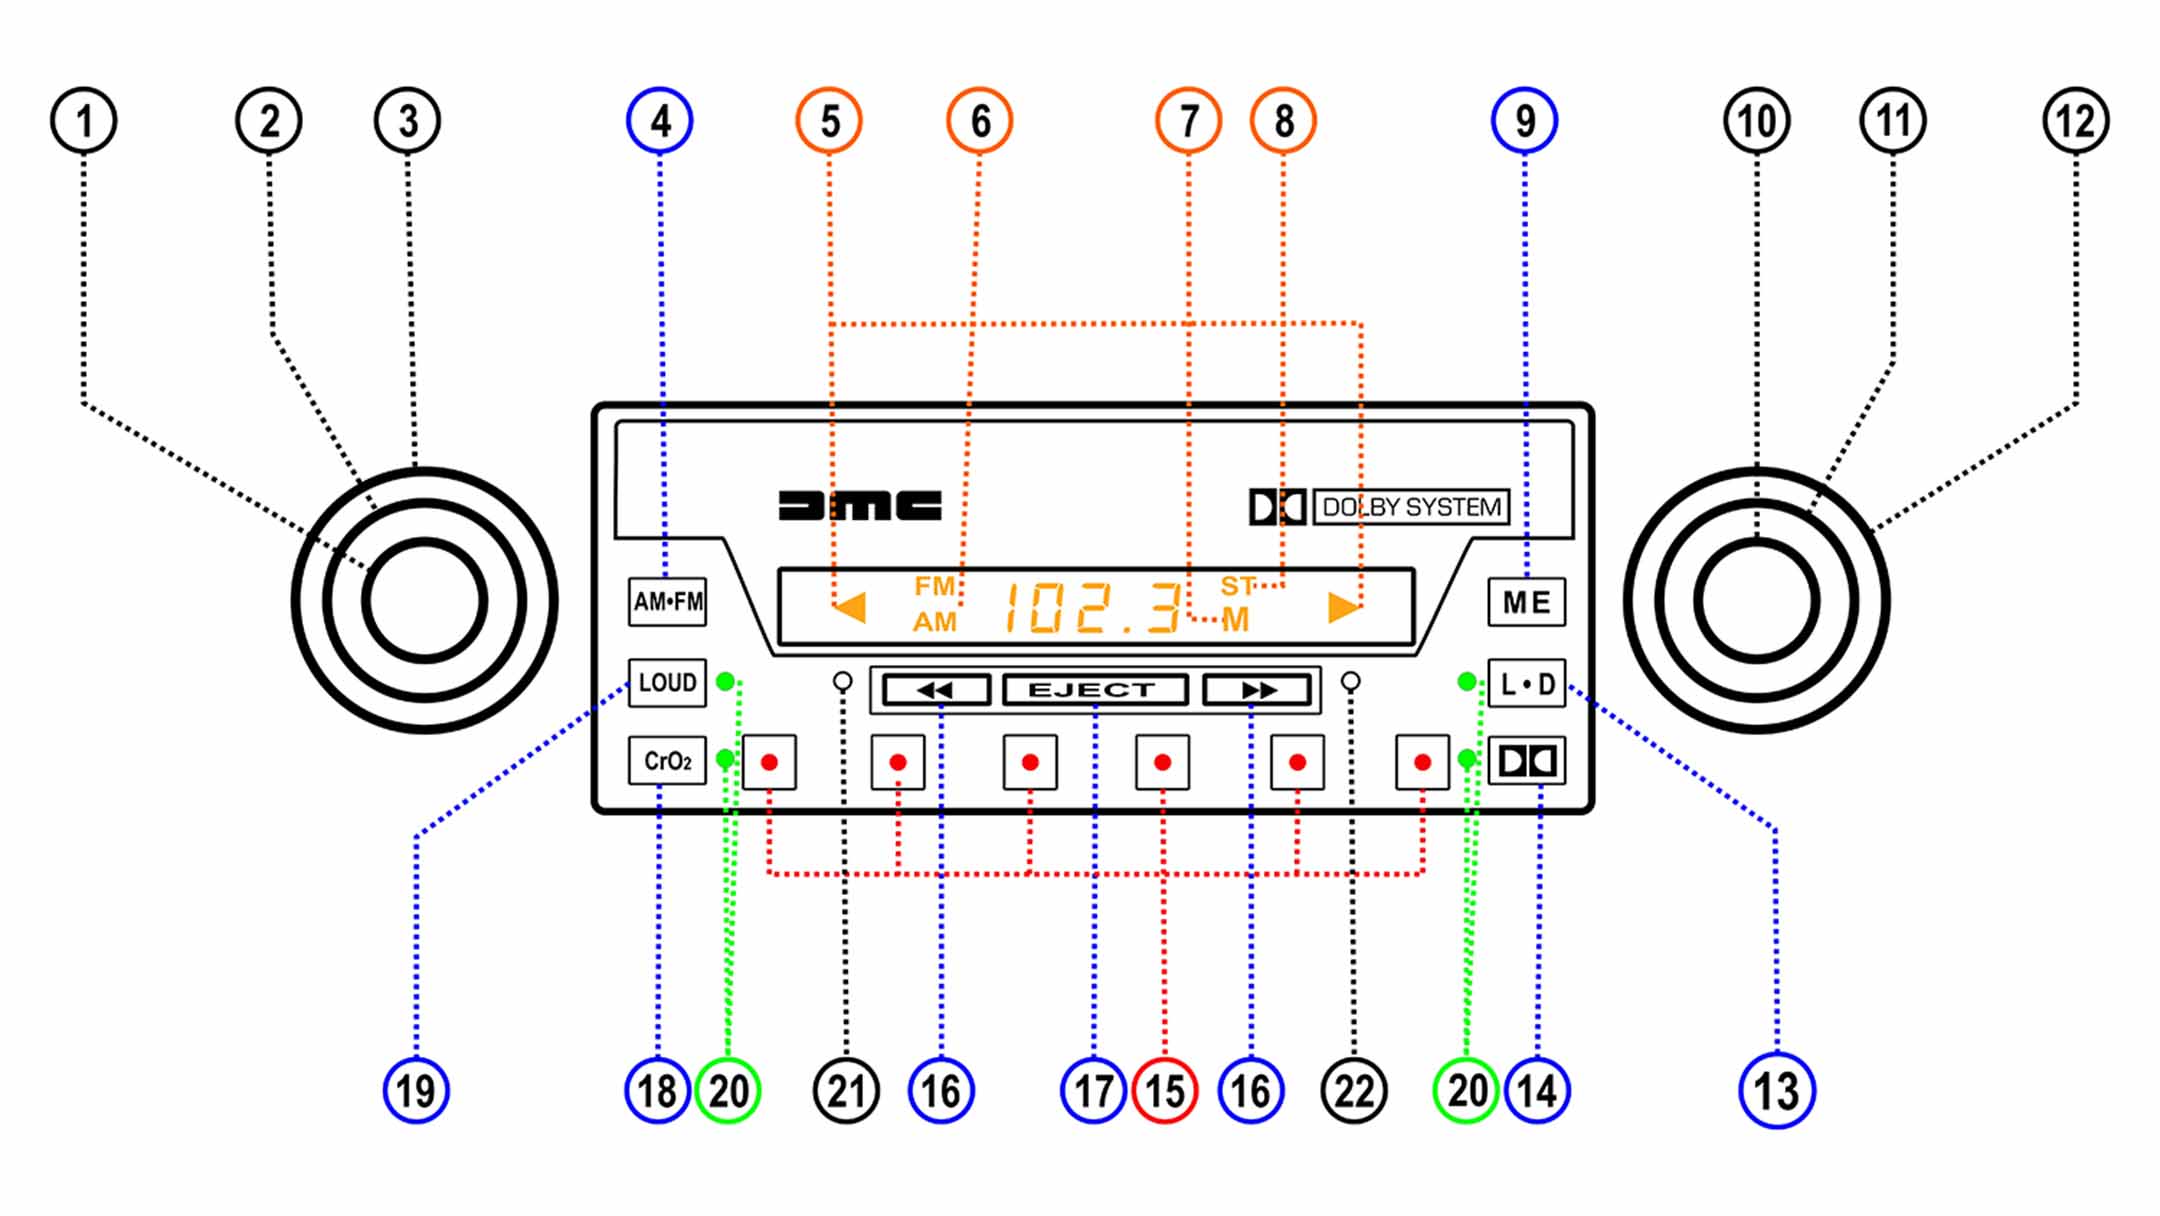
Thanks to the DeLorean community, someone out there scanned a copy of the ASI radio user manual. But, the original quality of the manual wasn’t great, so we recreated it, along with the legend map. Please do re-share and pass this around. After reading the manual, it looks like Audio Systems Inc. radio was kinda ‘high-tech’ for the day. And now you’ve ever wondered how to set the clock or what happens when you push the left knob in, here ya go. Click the cover photo for a PDF that is print-ready as a booklet, so you can print on your home printer, or at Kinko’s. Text version of the ASI manual AUDIO SYSTEMS, INC. RADIO OPERATION TO TURN TAPE PLAYER ON (1)The ON-OFF switch is combined with the VOLUME control, both of which, are operated by the front knob. Turn this knob clockwise until a “click” is heard, which indicates that the radio is now “ON”. Further clockwise rotation will increase the volume. AM / FM SELECTION (4)The desired broadcast band is selected by the “AM / FM” Selector Button which is the button marked “AM / FM”. The radio has the FM and AM band indicators (6) located to the left of the Radio Frequency display and the appropriate indicator will light up depending on whether FM or AM band is operating. MANUAL STATION TUNING (10)This radio is equipped with an electronic tuner. To tune to a station manually rotate the right front knob clockwise for up scale tuning and counterclockwise for down scale tuning. The frequency will appear on the digital display area of the radio. On the AM band the frequency will appear in the steps of 10 KHz and on the FM band the frequency will appear in steps of 0.2 MHz. Each “click” while rotating the manual tuning knob will be one step on the respective broadcast band. Tune the set carefully until you are exactly on the station. This FM receiver is equipped with an automatic muting circuit. This circuit filters out virtually all off station background noise when tuning from station to station. Also, when background noise is greater than the transmitted station signal, both the station signal and background noise are muted (filtered) out. SEEK TUNING (1)The SEEK tuning feature of this radio automatically locates the next strong station available on the radio dial when actuated. This feature operates in the up scale direction. The SEEK tuning feature is activated by pushing in the left front knob when in the radio mode. The radio automatically locates the next strong station and stops. This procedure can be repeated by pushing the left front knob again. Repeat until the desired station is being received. For maximum sensitivity of Seek Tuning feature, the L/D button (12) should be in the distant position. TUNING PUSHBUTTONS (15)Each tuning pushbutton can be set to two stations, one on the AM band and one on the FM band. This provides a total of twelve stations which can be selected by pushbutton operation. Each tuning pushbutton also has a dual color LED light in its center. These lights allow the user to easily locate each pushbutton at night. The lights change from red to green to indicate the last pushbutton operated. MEMORY (9)Set pushbuttons as follows:1. Select the desired broadcast band with the AM/FM selector button (4).2. Carefully tune to the desired station with the manual tuning control (10) or by using the SEEK tuning feature (1).3. Press the top right button marked “ME” for approximately ¾ second until the orange color “M” appears on the display area (7).4. Press one of the tuning push buttons. The “M” on the display area will go out indicating the button is now preset to this station.5. Repeat steps 2-4 for the remaining buttons.6. Set the AM/FM selector button (4) to the other broadcast band and set the six push buttons in the same manner as above. NOTE: THE ELECTRONIC CONTROL FUNCTIONS IN THE RADIO WILL NOT OPERATE PROPERLY IF POWER TO THE RADIO IS INTERRUPTED. THE POWER INTERRUPTION COULD BE CAUSED BY DISCONNECTION OF THE BATTERY, OR LOW BATTERY VOLTAGE AS MAY OCCUR IN COLD WEATHER STARTING. DISCONNECTION OF THE BATTERY WILL CAUSE LOSS OF PUSHBUTTON STATION MEMORY AND THE TIME. THE MEMORY AND CLOCK WILL REQUIRE RESETTING WHEN POWER IS RESTORED. LOW BATTERY VOLTAGE WILL CAUSE FAILURE IN THE SEEK TUNING OPERATION. THE SEEK TUNING WILL OPERATE PROPERLY WHEN POWER IS RESTORED. STEREO INDICATOR LIGHT (8)An FM Stereo light, “ST”, is located on the right side of the display area. This light will glow whenever the radio is tuned to an FM stereo station who’s broadcasting signal is of sufficient strength. If the stereo signal begins to weaken the radio will automatically blend to monaural reception. The mono mode will increase the radio’s ability to receive the weak signal. As the signal strength returns to a sufficient level the radio will automatically return to the Stereo mode. LOCAL / DISTANT SELECTOR (13)The center button on the right side of the radio marked “L/D” is the Local/Distant Selector. When the small green indicator light is on, the radio in the ‘Distant’ mode. When the indicator light is off, the radio is in the ‘Local’ mode. This which allows the user to discriminate the strong (‘Local’ position) from week stations (‘Distant’ position) in the FM mode. When the radio is in the Seek Tuning mode, this feature allows the user to discriminate the strong stations from week stations on both the am and FM bands. Your radio should be in the ‘DISTANT’ mode for the best reception under most conditions, an exception would be in an urban area with tall buildings. TREBLE CONTROL (2)The trouble response can be adjusted to the desired level with the middle knob on the left side of the radio. Rotating clockwise increases the treble and rotating counterclockwise decrease is the response. There is a detent Position at the middle point of the knob’s rotation. BALANCE CONTROL
DeLorean A-Pillar Restoration
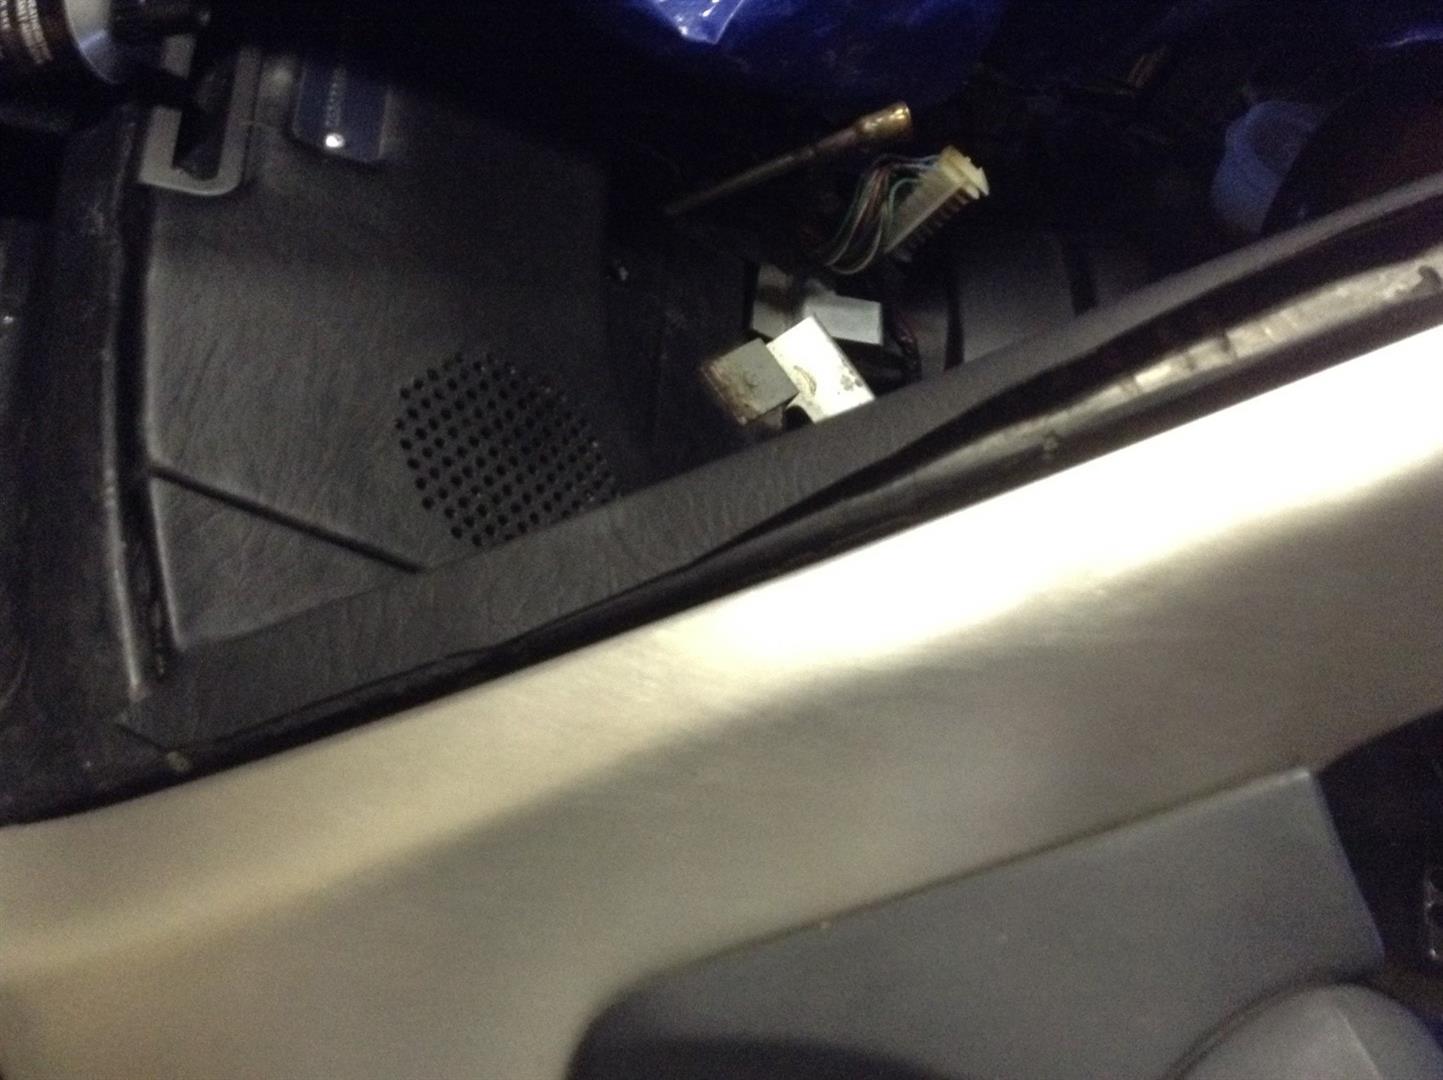
by Matt Kerns, VIN #03650 When I bought my car from upstate NY, the interior A-pillar windshield trim was deformed, pulling away, and the vinyl was hard and cracking. I decided to reshape and recover them rather than buy new ones. Steps: Remove the pillar trim by cutting the vinyl holding it to the car. I chose to remove the windshield and bracing the roof to properly remove and install the new trim, like factory gluing the vinyl, particularly under the glass. After separation, I stripped them of covering and glue, cleaning the plastic with acetone, MEK, mineral spirits, and whatever wouldn’t harm the plastic. To reshape the warped plastic, I clamped the flat side between two 1″x1″ pieces of wood, heating as I went with a low-to-medium setting on a heat gun. When I was done reforming, I left the pieces clamped for a couple days to ensure no spring back. I then traced the flat portion that was now reshaped, onto cardboard as a template, so I could transfer it to a thin 0.032 inch stiff aluminum sheet metal. I cut out the metal backing plate I just made, then glued / bonded it to the inside of the A-pillar trim using rubber cement (or any desired glue.) Note: The stock metal angle plate where the trim meets the dash is still used in conjunction with the new plate I just made, and should not be overlapped, as this will add thickness. Butt joint the two pieces. Take your desired covering material (I used automotive grade, one-way stretch-backed vinyl) and cover the plastic pillar, leaving about an inch overlap on the both sides, to wrap and glue under the windshield and under the door jamb where the door gasket fits over it. Let the glue dry completely to make sure it does not peel away from the trim piece. Dry fit the pillar on the car, wrapping the flat side-flap around/over where the glass would be, cutting the excess material off. (It should be about half-way along the frame, so about half-an-inch of material and half-an-inch of windshield surface for gluing, like the OEM.) Trimming Not pictured. I Used 3M double-sided foam tape to secure the trim to the car, sandwiched between the car and the metal plate I glued in. Use your desired glue to bond the flap to the frame (I used rubber cement.) Use Windshield glue to reinstall the windshield. *Remember to use the depth blocks to allow the right height for the shield to the body. Press on the door gaskets that overlap the vinyl and glue the vinyl to the door jamb. (I also added vinyl trim to the top of the windshield where it meets roof and headliner.) Photos:
Free Posters

Want some FREE DeLorean posters you can get printed at your local Walgreens for local pickup? Scroll down to see all the posters! DeLorean Patent poster These print great at 24″ x 36″ – DeLorean Patent Publication Goodyear NCT Tire poster This prints great at 16″ x 20″. Concours DeLorean poster This prints well at 18″ x 24″. July 27, 1986 Concours DeLorean sponsored by DeLorean One. DeLorean Cutaway poster This prints well at 12″ x 14″.
EZ-er DeLorean Oil Changes

by Chris Miles There comes a time in DeLorean ownership when you want to make maintenance tasks more convenient. After many years of ownership certain tasks because a hassle, like changing the oil. As most of us know, the stock oil drain plug is a bit of an odd duck. It takes a specially tool to remove the plug. This is especially troublesome if you elect to take the car to a shop to get an oil change. Not only do you need to carry the tool with you, you have to explain to the shop techs not to wrench down on the plug. One of the coolest upgrades I’ve come across for the car is the “EZ Oil drain valve”, sold by Toby Petersen at DeLorean Parts Northwest. It replaces the stock oil pan plug with a convenient valve that allow you to drain your oil effortlessly. No longer do you have to worry about special tools, copper crush washers, or stripping the drain plug socket.Toby has teamed up with EZ drain valve people to come up with a kit especially for the DeLorean. When you get the kit, you’ll find the valve body, an adapter, and two blue fiber washers. Once it’s all assembled on the car you should have a tight seal with no leaks. Due to the limited space between the oil pan and the frame crossmember, it’s a tight fit, but it all works. Once the valve is fitted, you won’t have to mess with it again. [flickr_tags tags=”post-3637″]
DeLorean Owners – Get Ready… for Ready Player One
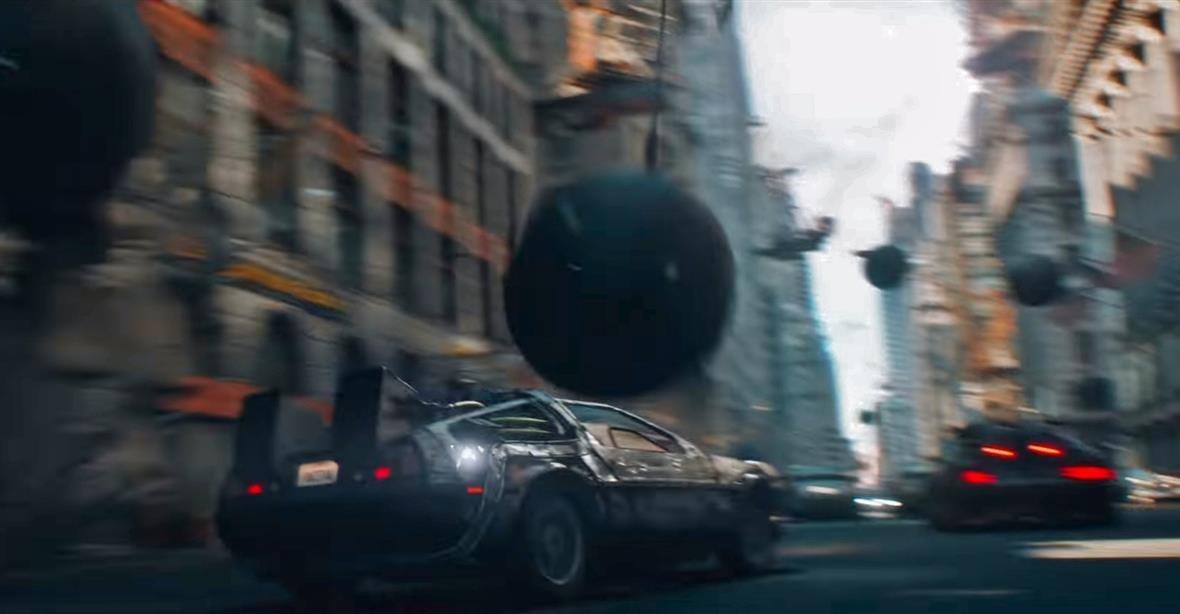
Okay DeLorean owners and DeLorean clubs… if you want to have some FUN with your car, you need to talk the general manager at your local movie theater NOW to setup something for March 30, 2018… The Ready Player One movie is going to be VERY popular, and having DeLoreans parked in front of the theater on opening day will be fun for everyone. Be it a DeLorean car show, or even just a single car. If you or your club DO coordinate with your local movie theater, be sure to create a Facebook event so that it’s easy to share, and easy for others to find out about it – and email DeLorean Directory so we can share it too. Stop by your local movie theaters and talk to a manager to see if you can work something out. Click here for a list of movie theaters in your area.